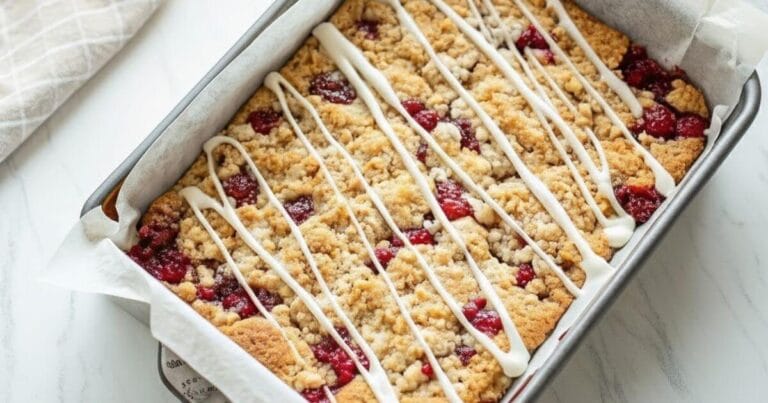
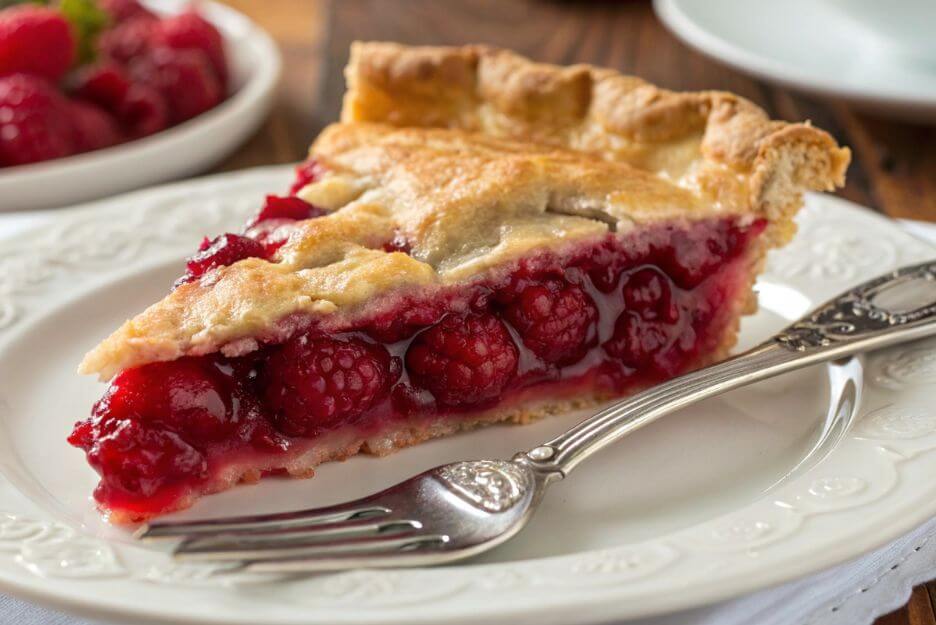
Homemade Raspberry Pie: 5 Easy Steps
Raspberry pie has been gracing American tables since the colonial era, when settlers discovered wild raspberries growing abundantly across the continent. European immigrants brought their pastry-making traditions, combining them with these native berries to create what would become a beloved dessert staple. Today, this classic treat represents the perfect marriage of tart and sweet flavors that defines American baking.
What makes this homemade raspberry pie recipe truly special? It’s surprisingly quick to prepare, uses budget-friendly ingredients you likely have on hand, and delivers restaurant-quality results every single time. Plus, fresh raspberries pack a nutritional punch with their high antioxidant content and vitamin C levels.
Whether you’re a beginner baker or seasoned pro, this foolproof recipe will have you creating bakery-worthy pies that’ll have everyone asking for seconds. Let’s dive into creating your perfect homemade raspberry pie masterpiece.
Table of Contents
Fresh Ingredients for Perfect Raspberry Pie
For the Pie Crust:
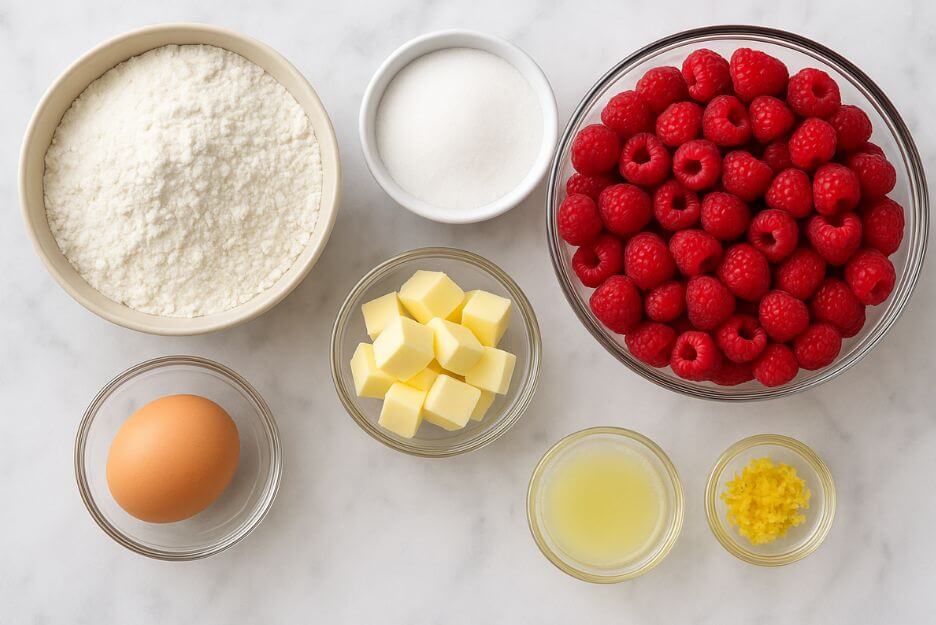
- 2½ cups all-purpose flour
- 1 teaspoon salt
- 1 tablespoon granulated sugar
- 1 cup cold unsalted butter, cubed
- 6-8 tablespoons ice water
- 1 large egg (for egg wash)
For the Raspberry Pie Filling:
- 6 cups fresh raspberries (about 2 pounds)
- ¾ cup granulated sugar
- ⅓ cup cornstarch
- 2 tablespoons lemon juice
- 1 tablespoon lemon zest
- ¼ teaspoon salt
- 2 tablespoons cold butter, cubed
Smart Substitutions:
Gluten-free option: Replace all-purpose flour with 1:1 gluten-free baking flour blend.
Dairy-free alternative: Substitute butter with cold vegan butter or coconut oil.
Sugar alternatives: Use ⅔ cup coconut sugar or ½ cup honey (reduce liquid slightly).
Berry swaps: Mix raspberries with blackberries, strawberries, or blueberries for variety.
Fresh vs. frozen: If using frozen raspberries, don’t thaw first and add an extra tablespoon of cornstarch.
Essential Equipment and Tools
Must-Have Items:
- 9-inch pie dish (glass or ceramic preferred)
- Large mixing bowls
- Pastry cutter or food processor
- Rolling pin
- Measuring cups and spoons
- Sharp knife
- Pastry brush
Kitchen Alternatives:
No pastry cutter? Use two butter knives or clean fingers to cut butter into flour.
No pie weights? Use dried beans or rice wrapped in foil for blind baking.
Step-by-Step Raspberry Pie Instructions
Step 1: Create the Perfect Pie Crust
Combine flour, salt, and sugar in a large bowl. Cut cold butter into small cubes and add to flour mixture. With your pastry cutter, blend the cold butter cubes into the flour blend, creating a texture that looks like chunky breadcrumbs with small butter flakes throughout.
Add the ice water slowly, starting with just one tablespoon at a time while stirring gently with your fork. You’ll know you’ve added enough when the mixture sticks together in your palm without feeling soggy or overly moist.
Step 2: Prepare Your Easy Homemade Raspberry Pie Dough
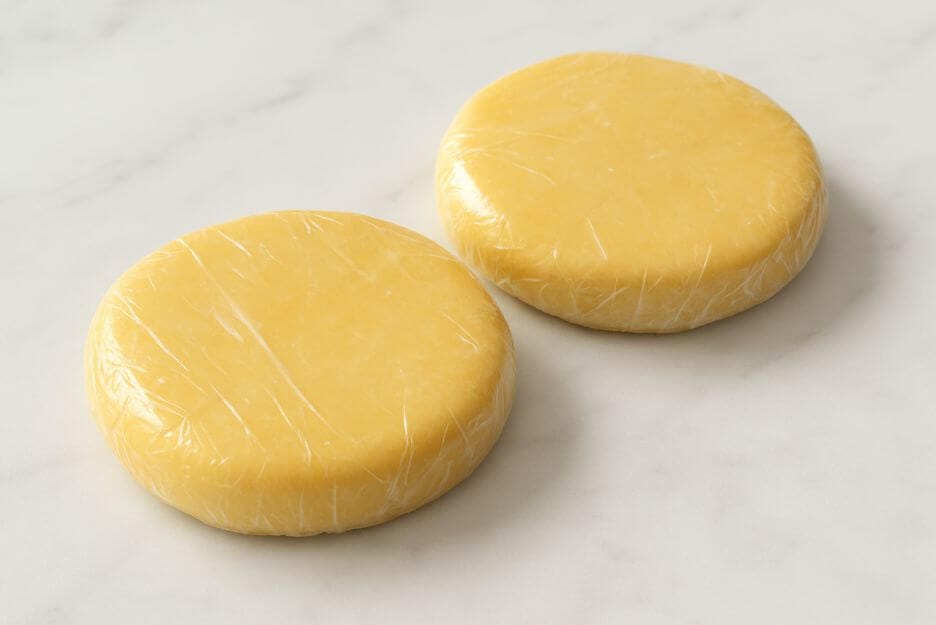
Split your dough mixture into two balls, keeping one portion about 25% larger than the other for your bottom layer. Form both pieces into flat, round discs, cover each with plastic film, and chill in your refrigerator for a minimum of 60 minutes.
This chilling step is crucial for preventing shrinkage and achieving that perfect flaky texture everyone craves in a raspberry pie.
Step 3: Roll Out the Bottom Crust
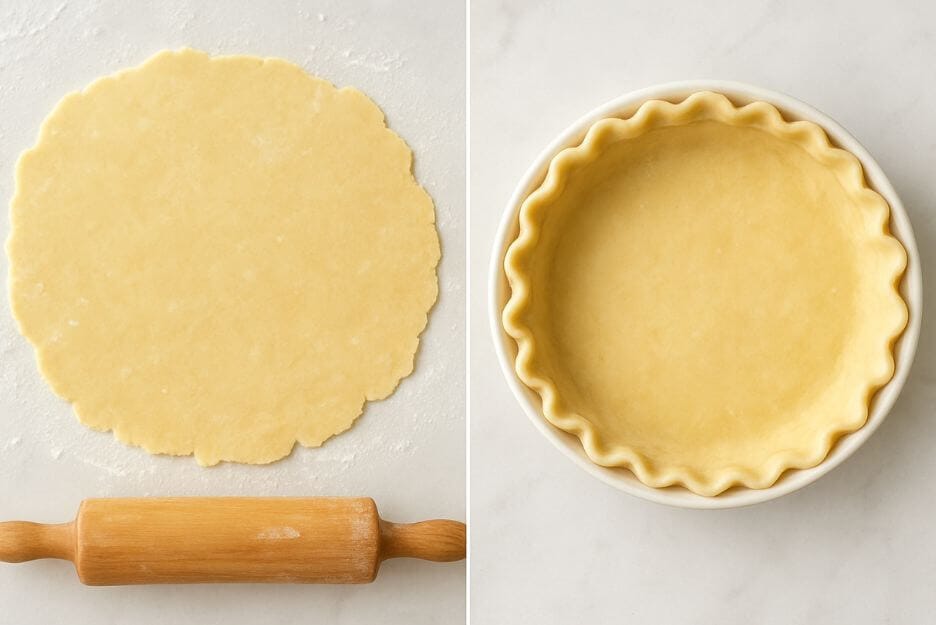
Remove larger dough disk from refrigerator and let sit for 5 minutes to soften slightly. On a lightly floured surface, roll dough from center outward, rotating frequently to maintain circular shape.
Roll to 12-inch diameter, then carefully transfer to pie dish. Gently press into bottom and sides without stretching. Trim excess dough, leaving 1-inch overhang.
Step 4: Make the Raspberry Pie Filling Recipe
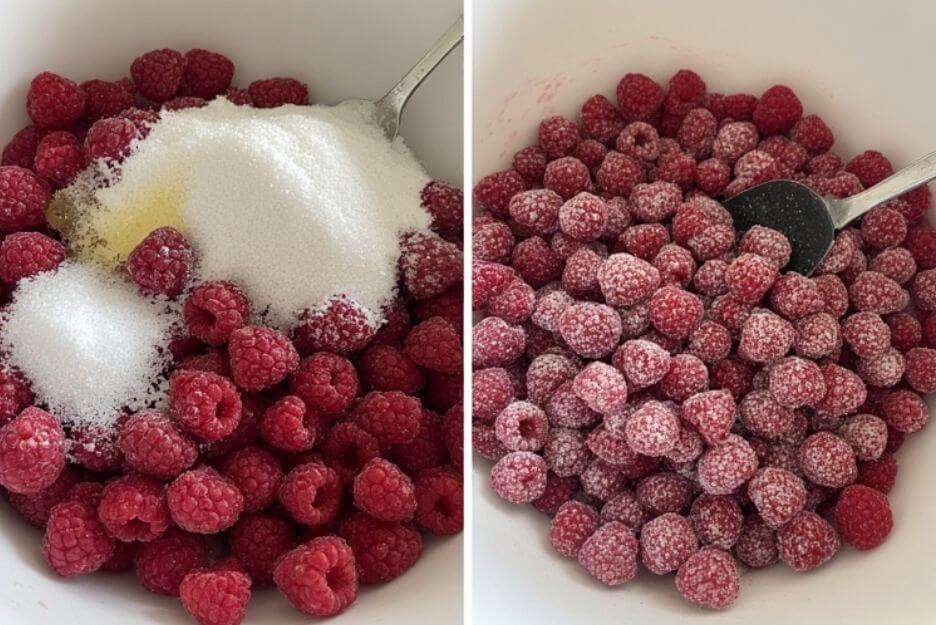
In a large bowl, gently combine fresh raspberries, sugar, cornstarch, lemon juice, lemon zest, and salt. Let mixture sit for 15 minutes to allow berries to release their natural juices.
This resting period helps create that perfect consistency in your raspberry pie filling recipe – not too runny, not too thick.
Step 5: Assemble Your Raspberry Pie
Preheat oven to 425°F (220°C). Pour raspberry mixture into prepared bottom crust and dot with cold butter cubes.
Roll out second dough disk and place over filling. Trim excess dough, leaving ½-inch overhang. Fold top crust under bottom crust edge and crimp decoratively to seal.
Step 6: Add Finishing Touches
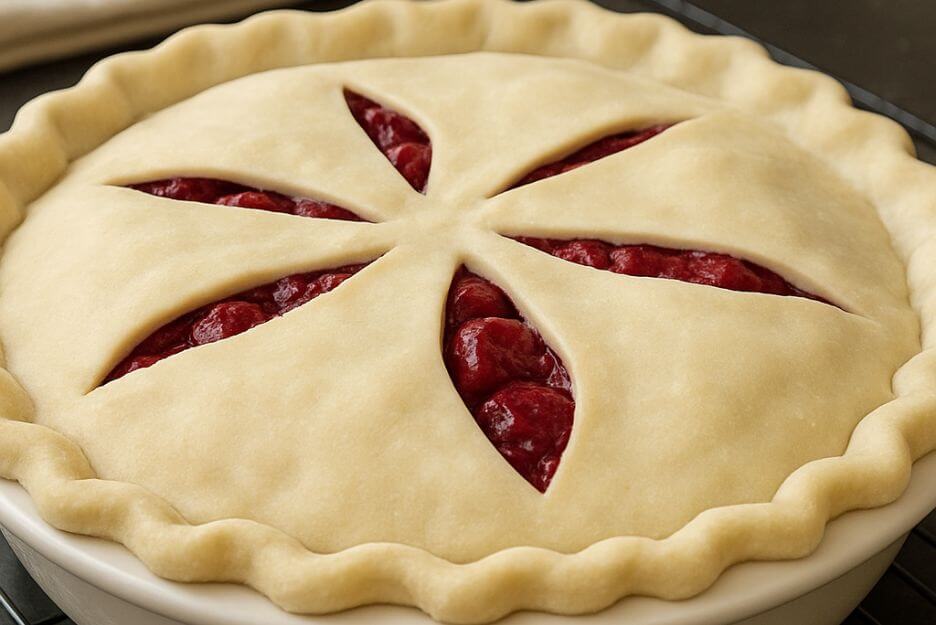
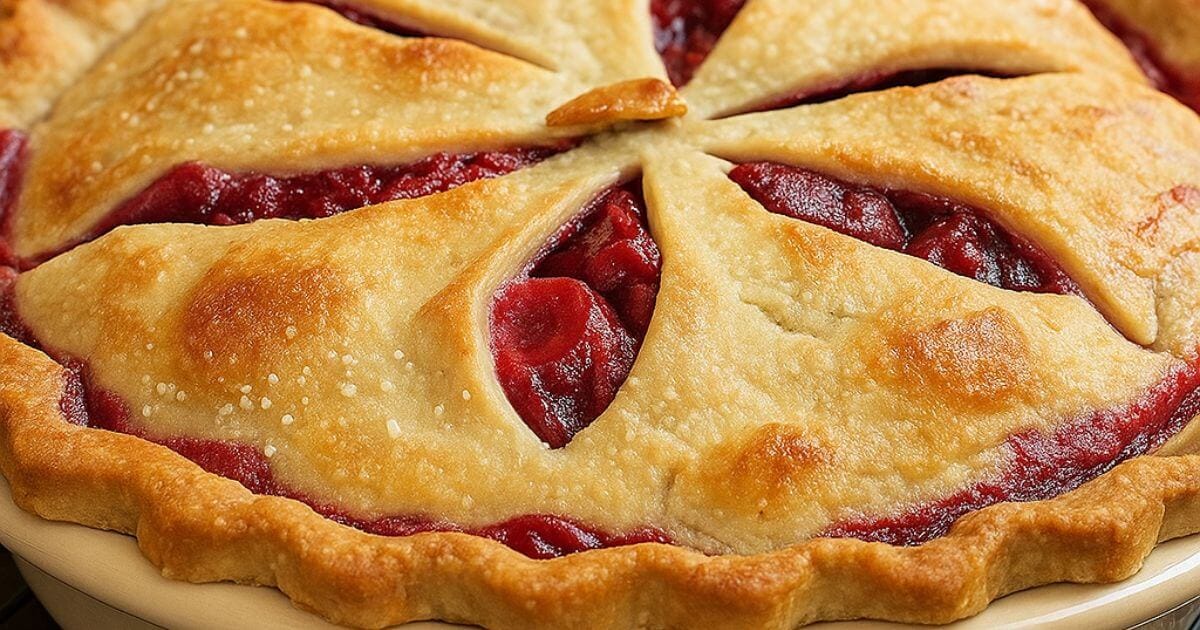
Cut 4-6 steam vents in top crust using a sharp knife. Brush entire surface with beaten egg for that gorgeous golden color.
Place pie on bottom oven rack and bake for 20 minutes. Reduce temperature to 375°F (190°C) and continue baking 35-40 minutes until crust is golden brown and filling bubbles through vents.
Step 7: Cool to Perfection
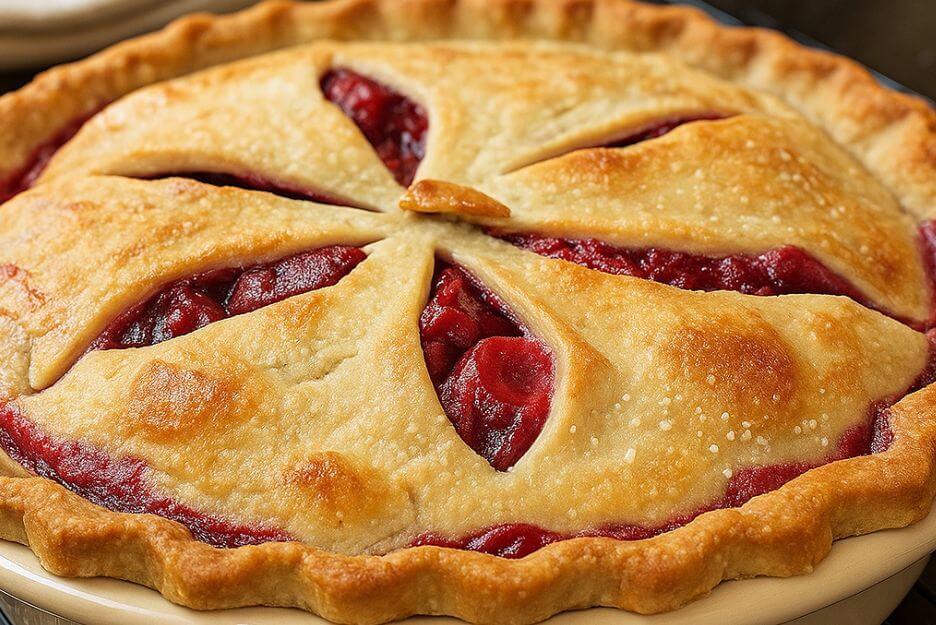
Remove pie from oven and cool on wire rack for at least 3 hours before slicing. This cooling time allows the filling to set properly – patience pays off with clean, beautiful slices!
Expert Tips for Raspberry Pie Success
Pro Baking Secrets:
Keep ingredients cold: Cold butter and ice water create steam during baking, resulting in flaky layers.
Don’t overwork dough: Minimal handling prevents tough, chewy crusts.
Pre-bake prevention: Place pie on preheated baking stone or inverted baking sheet to prevent soggy bottoms.
Perfect timing: Bake until filling bubbles vigorously through vents – this ensures cornstarch has fully activated.
Egg wash magic: Brush crust with beaten egg mixed with 1 tablespoon cream for extra richness and shine.
Common Mistakes to Avoid:
Overfilling: Leave ½-inch space at top to prevent spillovers.
Skipping vents: Steam needs escape routes to prevent crust from becoming soggy.
Cutting too early: Hot filling won’t hold its shape – patience creates picture-perfect slices.
Complete Nutritional Information
Per Slice (8 servings):
- Calories: 420
- Protein: 5g
- Carbohydrates: 58g
- Fat: 19g
- Fiber: 6g
- Sugar: 28g
- Sodium: 320mg
- Vitamin C: 25% Daily Value
- Manganese: 20% Daily Value
Health Benefits:
Raspberries provide powerful antioxidants called anthocyanins, which support heart health and may reduce inflammation. These berries also contain significant fiber, supporting digestive health and helping maintain stable blood sugar levels.
The vitamin C content supports immune function, while manganese aids in bone development and wound healing.
Nutritional Disclaimer: Values are approximate and may vary based on specific ingredients used. Consult healthcare providers for specific dietary concerns.
Storage and Reheating Guidelines
Proper Storage Methods:
Room temperature: Cover loosely with foil and store up to 2 days.
Refrigeration: Wrap tightly and refrigerate up to 5 days for best quality.
Freezing whole pie: Wrap tightly in plastic wrap, then aluminum foil. Freeze up to 3 months.
Freezing slices: Individual portions store beautifully for quick desserts later.
Reheating Instructions:
Oven method: Heat individual slices at 350°F for 10-15 minutes until warmed through.
Microwave option: Heat single slices for 30-45 seconds, though crust won’t be as crispy.
Perfect Serving Suggestions
Complementary Accompaniments:
Classic vanilla ice cream creates the perfect temperature contrast with warm pie.
Fresh whipped cream lightened with a touch of lemon zest enhances the berry flavors.
Crème fraîche adds sophisticated tanginess that complements raspberry tartness beautifully.
Chopped toasted almonds add delightful textural contrast and nutty flavor depth.
Beverage Pairings:
Coffee or espresso cuts through the pie’s richness perfectly.
Black tea with its tannins complements berry flavors wonderfully.
Frequently Asked Questions
Can I make this raspberry pie ahead of time?
Absolutely! Bake the pie completely, cool thoroughly, then cover and refrigerate. The flavors actually improve after a day.
What’s the secret to preventing a soggy bottom crust?
Use a glass pie dish so you can monitor browning, pre-bake on the lowest oven rack, and ensure your oven is fully preheated. Some bakers swear by brushing the bottom crust with beaten egg white before adding filling.
Can I use frozen raspberries for this easy homemade raspberry pie?
Yes, but don’t thaw them first. Add directly to the sugar mixture and include an extra tablespoon of cornstarch to handle the additional moisture. The pie may need 5-10 additional minutes of baking time.
How do I know when my raspberry pie is done baking?
The crust should be golden brown, and the filling should bubble vigorously through the steam vents. If the edges brown too quickly, cover with strips of aluminum foil and continue baking until the filling bubbles.
Why is my pie filling runny?
This usually happens when the pie is cut before cooling completely. The cornstarch needs time to set as the pie cools. If it’s still runny after proper cooling, the cornstarch may not have been heated sufficiently during baking.
Can I make individual raspberry pies instead?
Certainly! Use 4-6 inch individual pie tins, reduce baking time to 15-20 minutes at 425°F, then 20-25 minutes at 375°F. Watch carefully as smaller pies bake faster.
What’s the best way to prevent pie crust shrinkage?
Keep dough cold, don’t overwork it, and avoid stretching when placing in the pie dish. Chilling the assembled unbaked pie for 30 minutes before baking also helps maintain shape.
Your Perfect Homemade Raspberry Pie Awaits
Creating the perfect homemade raspberry pie doesn’t require years of baking experience – just quality ingredients, careful attention to technique, and a little patience. This classic dessert brings together the best of summer’s bounty in a flaky, golden package that’s guaranteed to impress family and friends.
The beauty of this raspberry pie lies in its versatility and forgiving nature. Whether you’re celebrating a special occasion or simply craving something sweet, this recipe delivers consistent, delicious results every single time.
Remember, the key to success lies in keeping your ingredients cold, handling the dough gently, and allowing proper cooling time. With these simple principles, you’ll be creating bakery-quality pies that rival any professional kitchen.
So preheat that oven, gather your raspberries, and get ready to fill your home with the irresistible aroma of fresh-baked homemade raspberry pie. Your taste buds – and everyone lucky enough to share a slice – will thank you for the effort.