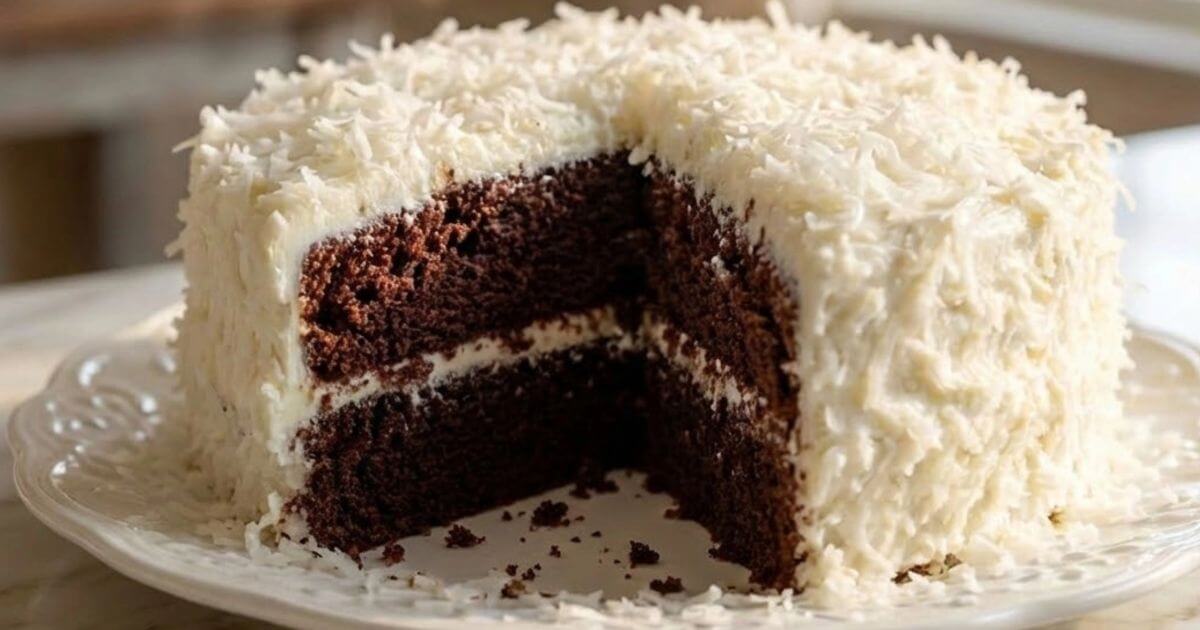
How To Make Chocolate Coconut Cake In Easy Steps
There is something undeniably magical about the marriage of deep, Dutch-processed cocoa and the tropical, creamy sweetness of coconut. If you are a fan of Mounds or Almond Joy bars, this Chocolate Coconut Cake is about to become your new obsession. It’s a dessert that feels sophisticated enough for a dinner party but is humble enough for a Sunday afternoon treat.
While the combination of chocolate and coconut has roots in tropical regions like Southeast Asia and the Caribbean, it became a staple of American baking in the mid-20th century. This particular version focuses on achieving a crumb so tender it almost melts, balanced by a velvety coconut cream frosting.
The best part? This Chocolate Coconut Cake is surprisingly budget-friendly and uses pantry staples you likely already have. Despite its gourmet appearance, it’s a simple chocolate coconut cake that even a beginner baker can master. Let’s dive into the details and get your kitchen smelling like a chocolatey paradise.
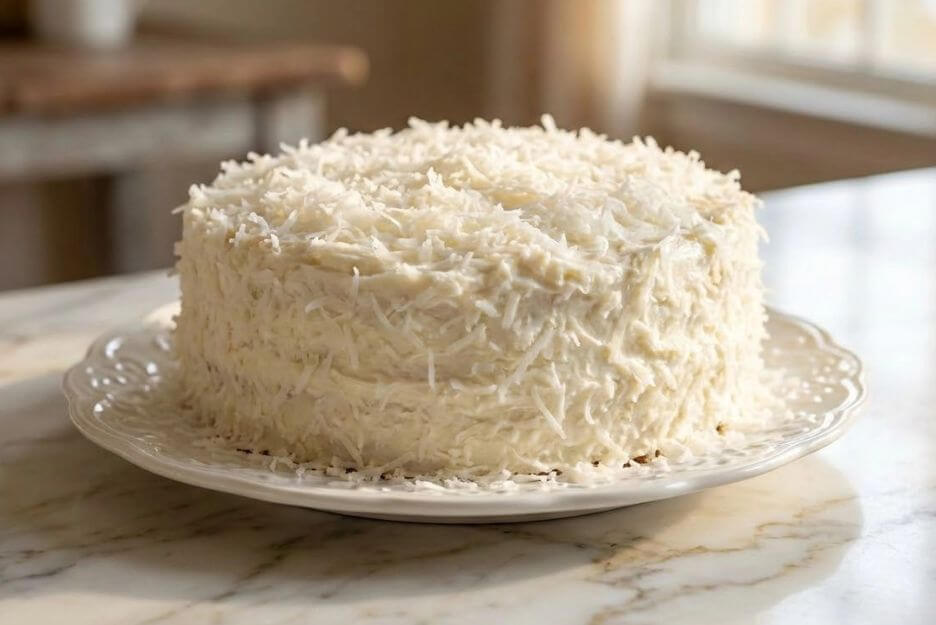
Table of Contents
Ingredients You Will Need
To create the perfect moist chocolate coconut cake, quality is everything. Using high-quality cocoa powder and full-fat coconut milk will make a world of difference in the final texture.
For the Chocolate Sponge
- All-Purpose Flour: 2 cups (sifted)
- Granulated Sugar: 2 cups
- Unsweetened Cocoa Powder: ¾ cup (high-quality Dutch-processed)
- Baking Powder: 2 tsp
- Baking Soda: 1 ½ tsp
- Salt: 1 tsp
- Large Eggs: 2 (room temperature)
- Full-Fat Coconut Milk: 1 cup (canned is best for richness)
- Vegetable Oil: ½ cup (or melted coconut oil)
- Vanilla Extract: 2 tsp
- Boiling Water: 1 cup (this “blooms” the cocoa for deeper flavor)
For the Creamy Coconut Frosting
- Unsalted Butter: 1 cup (softened)
- Cream Cheese: 8 oz (softened)
- Powdered Sugar: 4 cups
- Coconut Cream: 3 tbsp (the thick part at the top of the can)
- Shredded Coconut: 1 ½ cups (sweetened or unsweetened, based on preference)
Substitutions & Dietary Notes
- Gluten-Free: Swap the all-purpose flour for a 1:1 gluten-free baking blend.
- Vegan Option: Use flax eggs (2 tbsp ground flax + 6 tbsp water) and plant-based butter/cream cheese.
- Sugar-Free: Replace granulated sugar with an erythritol-based monk fruit sweetener.
Equipment & Tools Needed
You don’t need a professional bakery setup to nail this easy chocolate coconut cake. Here is the basic kit:
- Two 9-inch Round Cake Pans: For a classic double-layer look.
- Mixing Bowls: One large for dry ingredients, one medium for wet.
- Electric Hand Mixer or Stand Mixer: Essential for a fluffy frosting.
- Whisk and Silicone Spatula: For folding and combining.
- Parchment Paper: To ensure your cakes pop out perfectly.
- Wire Cooling Rack: To prevent the bottom of the cake from getting soggy.
Pro-tip: If you don’t have round pans, a 9×13 inch rectangular baking dish works perfectly for a “snack cake” style!
Step-by-Step Instructions
Follow these steps to ensure your chocolate coconut cake recipe turns out flawless every single time.
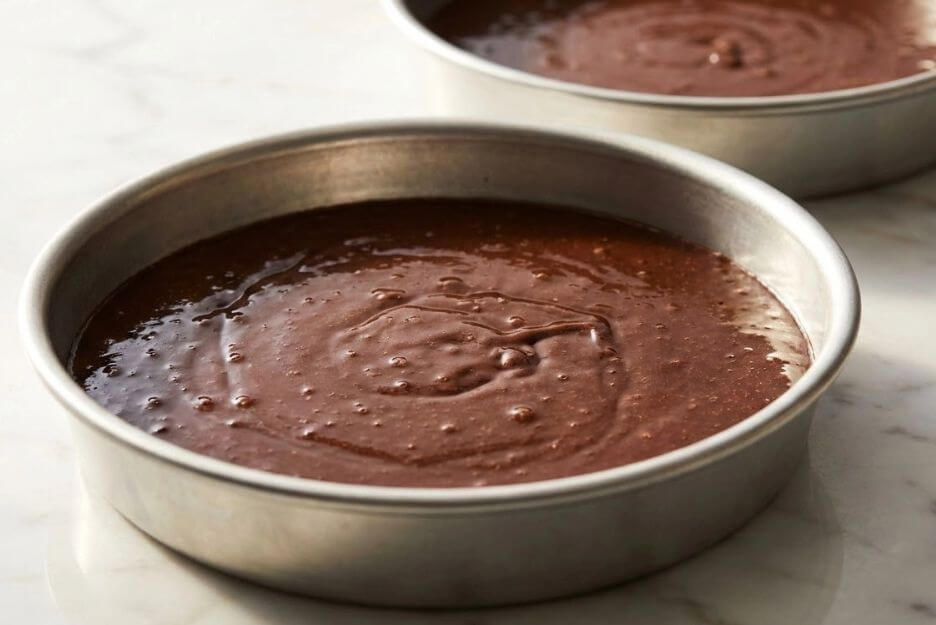
- Prep the Oven and Pans: Preheat your oven to 350°F (175°C). Grease your cake pans with butter or oil and line the bottoms with parchment paper. This is the secret to never having a cake stick.
- Mix Dry Ingredients: In a large bowl, whisk together the flour, sugar, cocoa powder, baking powder, baking soda, and salt. Ensure there are no large cocoa clumps.
- Combine Wet Ingredients: In a separate bowl, beat the eggs, coconut milk, oil, and vanilla extract until smooth.
- Merge the Mixtures: Slowly add the wet ingredients to the dry ingredients. Mix on medium speed until well combined.
- Bloom the Cocoa: Carefully pour in the boiling water. The batter will be very thin don’t panic! This is what creates an incredibly moist chocolate coconut cake.
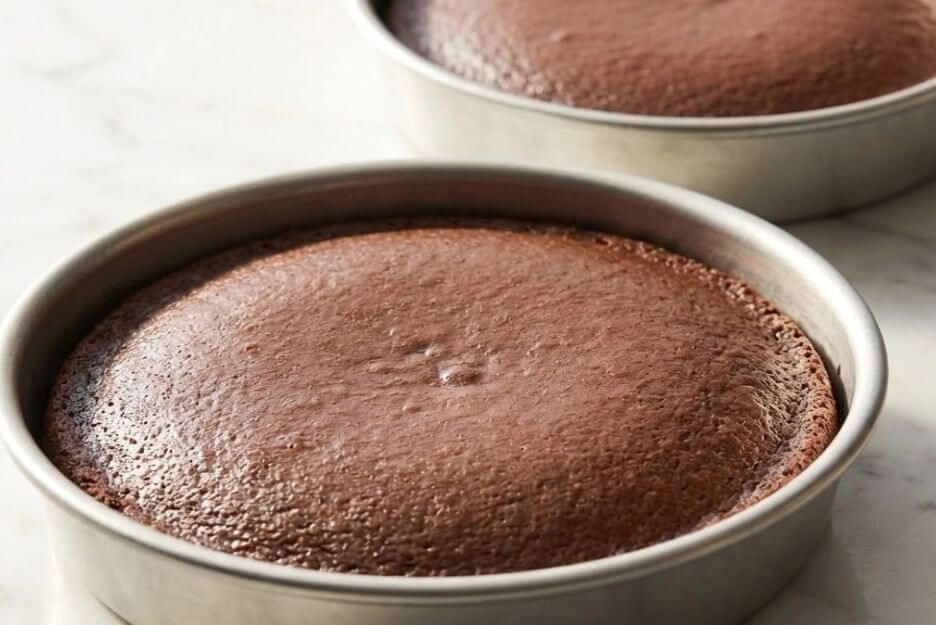
- Bake the Layers: Divide the batter evenly between the two pans. Bake for 30–35 minutes. A toothpick inserted into the center should come out clean or with just a few moist crumbs.
- Cool Completely: Let the cakes rest in the pans for 10 minutes, then transfer them to a wire rack. They must be completely cool before frosting, or the butter will melt.
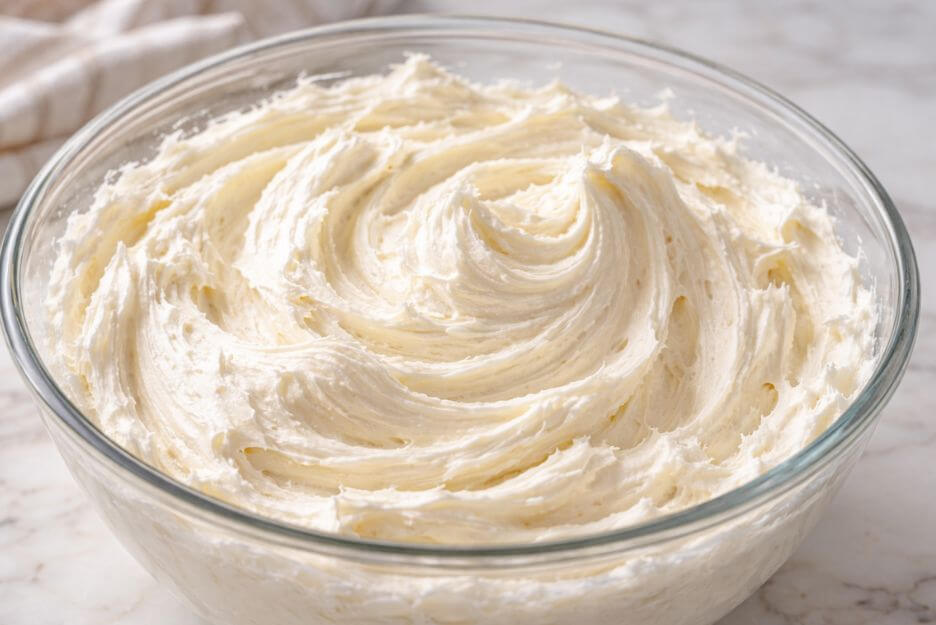
- Whip the Frosting: Beat the butter and cream cheese together until pale and fluffy. Gradually add powdered sugar and coconut cream.
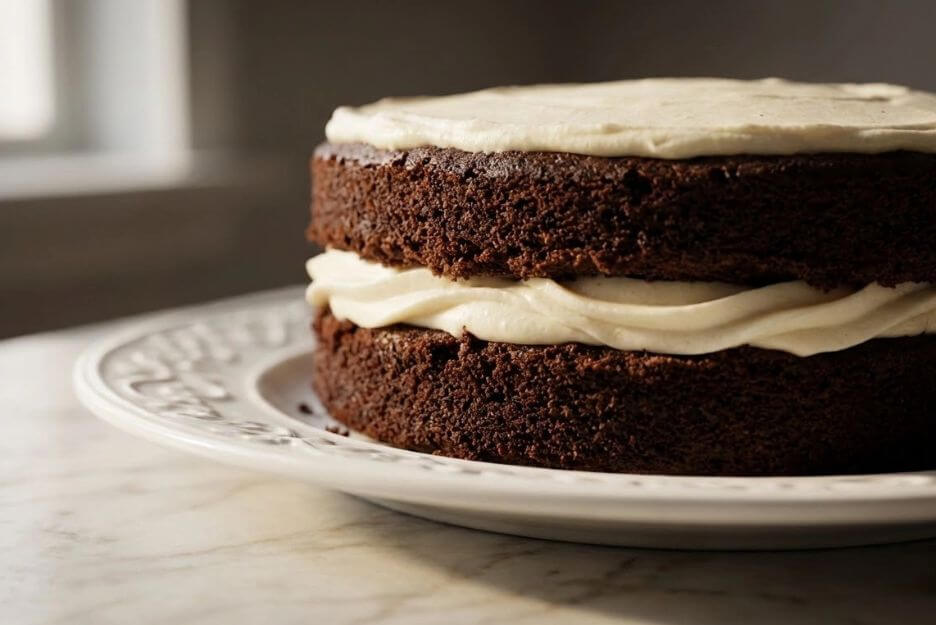
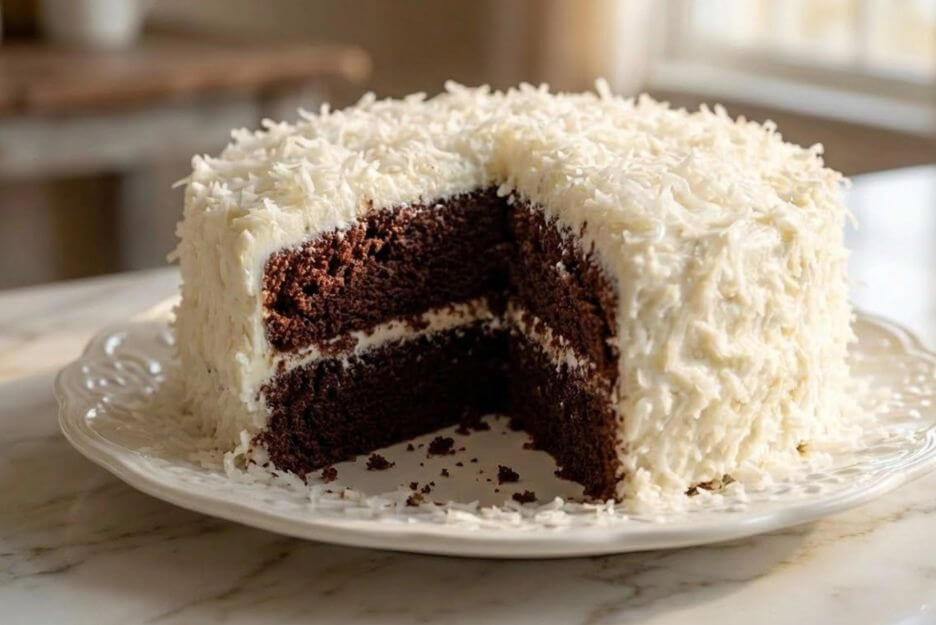
- Assemble: Place one cake layer on a plate. Spread a thick layer of frosting and a sprinkle of shredded coconut. Top with the second layer.
- Final Touch: Frost the top and sides of the cake. Press the remaining shredded coconut into the sides for a beautiful, rustic look.
Expert Tips & Variations
- Don’t Overmix: Once you add the flour, mix only until the white streaks disappear. Overworking the gluten makes the cake tough.
- Toast Your Coconut: For a deeper nutty flavor, toast your shredded coconut in a dry pan over medium heat for 3–5 minutes until golden.
- Temperature Matters: Ensure your eggs and coconut milk are at room temperature to prevent the batter from curdling.
- The Coffee Hack: Replace the boiling water with hot brewed coffee. It doesn’t make the cake taste like coffee; it just intensifies the chocolate flavor.
- Filling Variation: Add a layer of chocolate ganache between the layers for an extra indulgent Chocolate Coconut Cake.
Nutritional Information
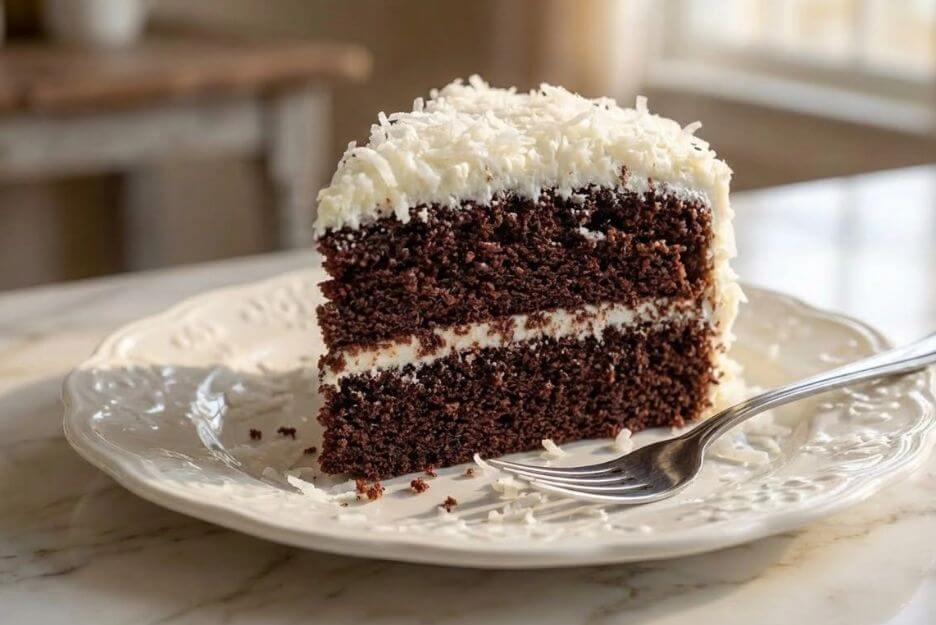
Serving Size: 1 slice (based on 12 servings)
| Nutrient | Amount |
| Calories | 480 kcal |
| Total Fat | 26g |
| Saturated Fat | 15g |
| Carbohydrates | 58g |
| Fiber | 3g |
| Protein | 5g |
| Sugar | 42g |
Health Note: Coconut contains Medium-Chain Triglycerides (MCTs), which can provide a quick energy boost. Cocoa is rich in flavonoids, which are great for heart health.
Disclaimer: Nutritional values are estimates based on standard ingredients. Consult a professional for specific dietary needs.
Storage & Reheating Instructions
Because of the cream cheese in the frosting, this simple chocolate coconut cake needs a bit of care.
- Refrigeration: Keep the cake in an airtight container in the refrigerator for up to 5 days.
- Room Temperature: It can sit out for up to 2 hours while serving just avoid placing it in direct sunlight.
- Freezing: Unfrosted cake layers freeze beautifully. Wrap them securely in plastic wrap and foil, and they’ll keep well for up to 3 months.
- Reheating: For a warm, gooey slice, microwave a portion for 10–15 seconds to bring out that rich, fudgy chocolate texture.
Serving Suggestions
To elevate your dessert experience, try these pairings:
- The Classic Side: A scoop of high-quality vanilla bean ice cream.
- Fruit Pairing: Fresh raspberries or sliced strawberries cut through the richness of the chocolate perfectly.
- Beverage: A tall glass of cold almond milk or a bold Espresso.
- Garnish: A drizzle of salted caramel sauce or a few curls of dark chocolate on top.
FAQ Section
Q: Can I use desiccated coconut instead of shredded?
A: Yes, but desiccated coconut is much drier. If using it in the frosting, you might need an extra tablespoon of coconut milk to maintain the creamy texture.
Q: Why is my cake sinking in the middle?
A: This usually happens if the oven door is opened too early or if the baking soda/powder is expired. Make sure your leavening agents are fresh!
Q: Can I make this a sheet cake?
A: Absolutely. Use a 9×13 pan and bake for 35–40 minutes. It’s an easy chocolate coconut cake solution for potlucks.
Q: Is canned coconut milk necessary?
A: Yes, the carton milk used for cereal is mostly water. Canned full-fat coconut milk provides the fat content needed for a moist crumb.
Q: How do I get the coconut to stick to the sides?
A: While the frosting is still “tacky” (freshly applied), gently press handfuls of coconut against the sides. Use a parchment paper sheet under the cake to catch the fall-off!
Mastering a Chocolate Coconut Cake doesn’t require a culinary degree just a love for bold flavors and a few simple steps. From the “bloomed” cocoa powder to the creamy coconut topping, every element of this cake is designed to impress. Whether it’s for a birthday or just a “treat yourself” Tuesday, this chocolate coconut cake recipe is a guaranteed winner.