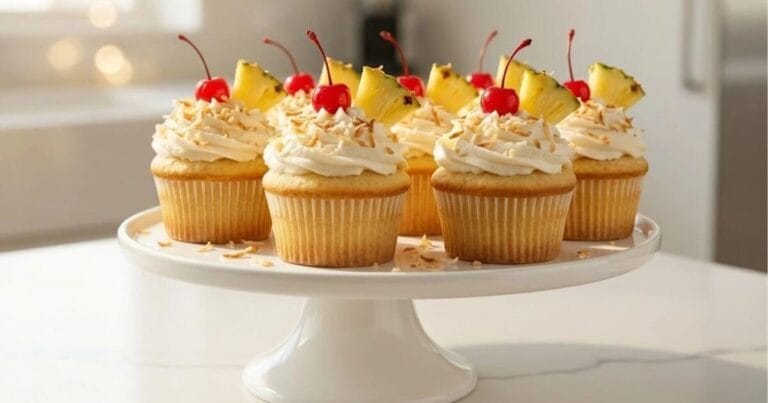
How to Get Pink and White Cupcakes Easily
The cupcake itself, as we know it today, gained massive popularity in the 21st century, but its roots go back to the late 18th century. Before standardized baking pans, cakes were often baked in small cups or ramekins—hence the name “cup cake.” The sheer simplicity and single-serving size have made them an enduring classic. Our modern Pink and White Cupcakes take this classic foundation and add a splash of playful, charming color.
The key benefits of this particular recipe are its speed and budget-friendliness. Unlike complicated layered cakes, these treats are quick to prepare, bake in a flash, and only require common pantry staples. Plus, you get a show-stopping dessert without breaking the bank. By following this detailed guide, you’ll master one of the best pink and white cupcakes recipes out there, ensuring a moist, flavorful cake every single time. Get ready to bake!
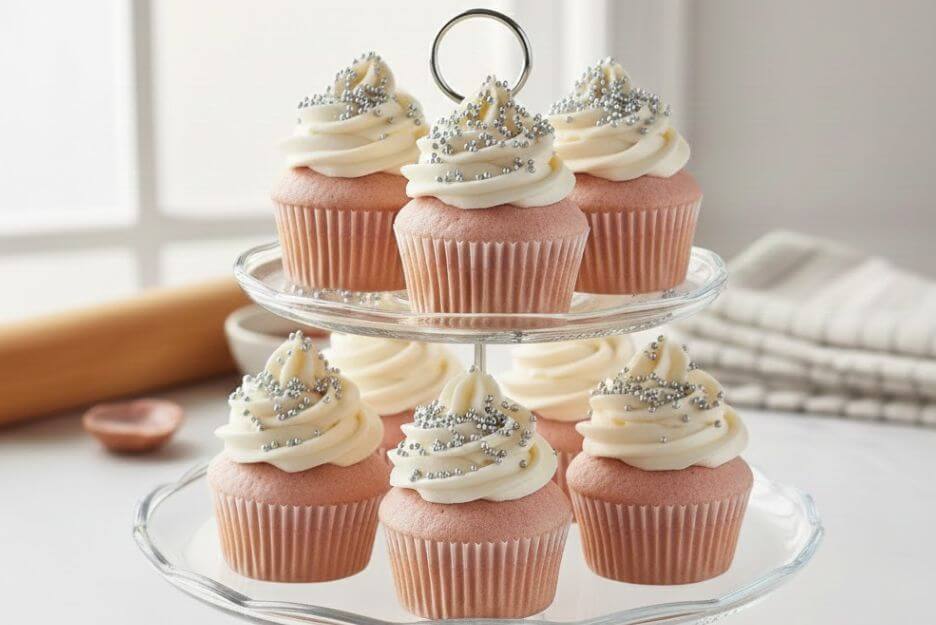
Table of Contents
Ingredients Section: Gathering Your Baking Arsenal
Creating the best pink and white cupcakes starts with quality ingredients. For simplicity, we are using a classic vanilla cake base, which provides the perfect neutral canvas for the vibrant pink hue.
For the Pink Cupcakes:
- 1 ½ cups (190g) All-Purpose Flour (sifted)
- 1 cup (200g) Granulated Sugar
- 1 ½ tsp Baking Powder
- ½ tsp Salt
- ½ cup (115g) Unsalted Butter, softened
- 2 large Eggs, room temperature
- 1 tsp Pure Vanilla Extract
- ½ cup (120ml) Whole Milk, room temperature
- ¼ cup (60ml) Buttermilk (or milk with 1/2 tsp lemon juice)
- 2-3 drops Pink Gel Food Coloring (Gel works best for vibrant color!)
For the White Vanilla Buttercream Frosting:
- 1 cup (225g) Unsalted Butter, softened
- 3-4 cups (360-480g) Powdered Sugar (Confectioners’ Sugar), sifted
- 1 tsp Pure Vanilla Extract
- 2-4 Tbsp Whole Milk or Heavy Cream
Substitution Options for Dietary Needs:
- Gluten-Free: Swap the All-Purpose Flour for a 1:1 Gluten-Free Baking Blend. Ensure it contains Xanthan Gum.
- Dairy-Free: Use unsweetened Almond or Oat Milk in place of Whole Milk and Buttermilk. Substitute unsalted dairy-free butter sticks for the regular butter in both the cake and frosting.
- Vegan: Use vegan butter and substitute the two large eggs with flax eggs (2 Tbsp flax meal mixed with 6 Tbsp water, rested for 5 minutes).
A Note on Ingredient Quality:
For the best flavor, always use pure vanilla extract—never imitation. Also, ensure your butter is genuinely softened, meaning it indents when lightly pressed, but isn’t oily or melted. This is crucial for a smooth cake batter and fluffy buttercream.
Equipment & Tools Needed
Baking these delightful treats requires only a few standard kitchen tools. You don’t need anything fancy to make truly beautiful pink cupcakes.
- Standard 12-Cup Muffin Tin
- Paper Cupcake Liners
- Electric Mixer (Handheld or Stand Mixer) – Highly recommended for light, fluffy batter and creamy frosting.
- Two Large Mixing Bowls
- Measuring Cups and Spoons
- Wire Rack for cooling
- Piping Bag and Star Tip (e.g., Wilton 1M) – Optional, but the key to a professional-looking swirl. If you don’t have one, a simple Ziploc bag with a corner snipped off works just fine.
Alternatives for Uncommon Tools:
If you don’t have an electric mixer, you can mix the batter by hand with a whisk. Just be sure to really cream the butter and sugar well, and don’t overmix after adding the flour. A spatula can be used for the frosting, but you may need to add a bit more liquid to ensure it’s easily spreadable.
Step-by-Step Instructions: Baking Your Perfect Pink Treats
Follow these simple steps to create perfectly moist and fluffy pink and white cupcakes easily.
Step 1: Prepare the Oven and Pan
Preheat your oven to 350°F (175°C). Line the standard 12-cup muffin tin with paper liners. This small prep step is vital for easy cleanup later.
Step 2: Combine Dry Ingredients
Whisk together the flour, granulated sugar, baking powder, and salt in a medium bowl. Set this aside. This ensures all the leavening agents are evenly distributed.
Step 3: Cream the Butter and Sugar
In a large mixing bowl (or the bowl of your stand mixer), beat the softened butter and the sugar on medium-high speed until the mixture is light and fluffy—this should take 3 to 5 minutes. This step incorporates air, which gives your pink cupcakes their light texture.
Step 4: Add Wet Ingredients
Beat in the eggs one at a time, ensuring each is fully incorporated before adding the next. Stir in the pure vanilla extract. In a separate cup, mix together the whole milk and buttermilk.
Step 5: Mix Batter to Perfection
Alternate adding the flour mixture and the milk mixture to the butter mixture, starting and ending with the flour. Mix on low speed only until just combined. Tip: Do not overmix! Overmixing develops too much gluten, resulting in tough, dense cakes.
Step 6: Color the Batter
Transfer about 2/3 of the batter into a separate bowl. Add 2-3 drops of pink gel food coloring to the main bowl of batter and gently fold it in until you reach your desired shade of pink. You now have the beautiful pink base for your easy pink and white cupcakes.
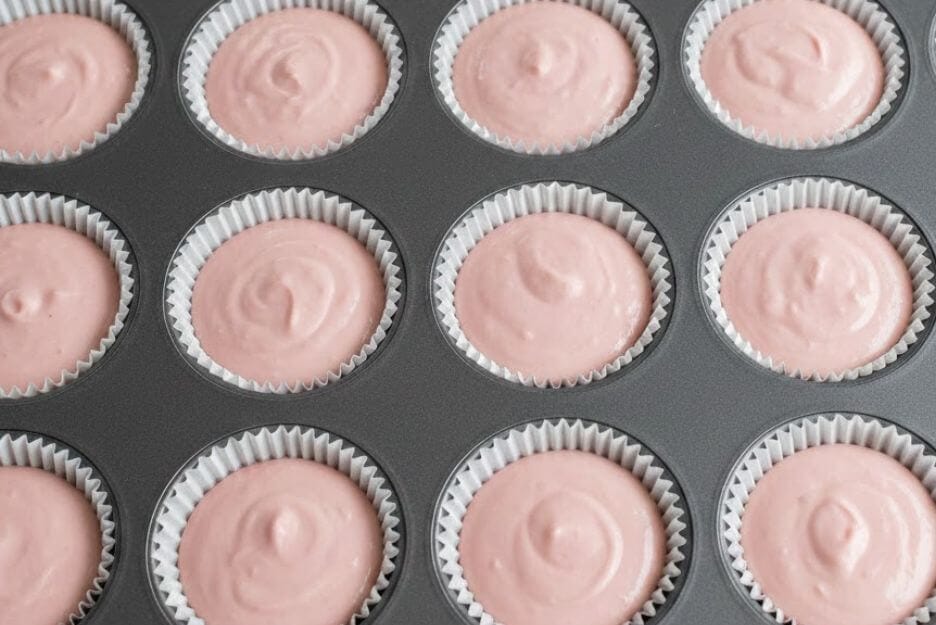
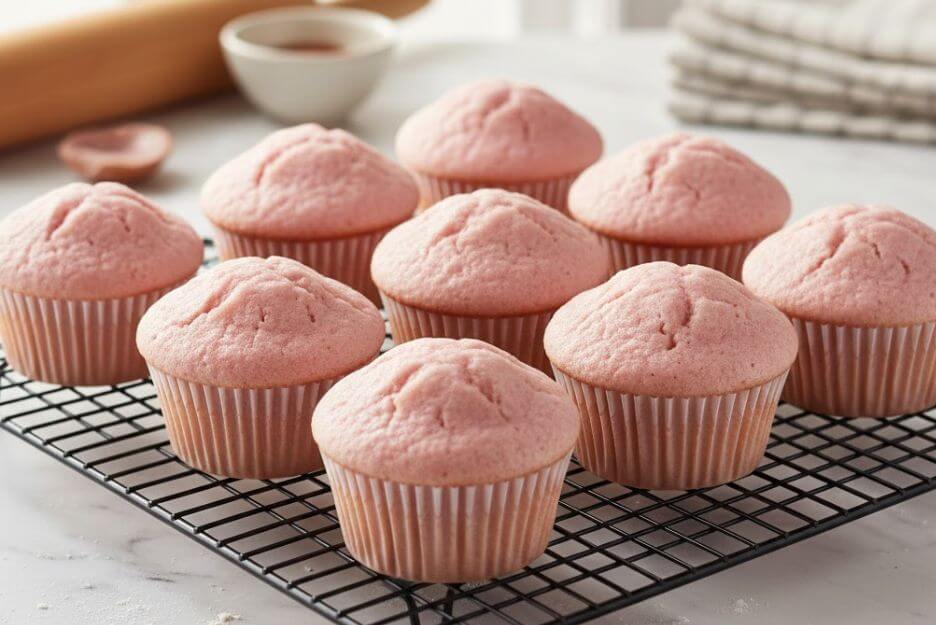
Step 7: Fill the Liners and Bake
Divide the pink batter evenly among the prepared cupcake liners, filling each cup about 2/3 full. You should get 12 perfect cupcakes. Bake for 18 to 20 minutes, or until a toothpick inserted into the center comes out clean.
Step 8: Cool Completely
Remove the baked cupcakes from the oven and immediately transfer them to a wire rack. Allow them to cool completely before frosting—about 45-60 minutes. Frosting warm cakes leads to a melty mess!
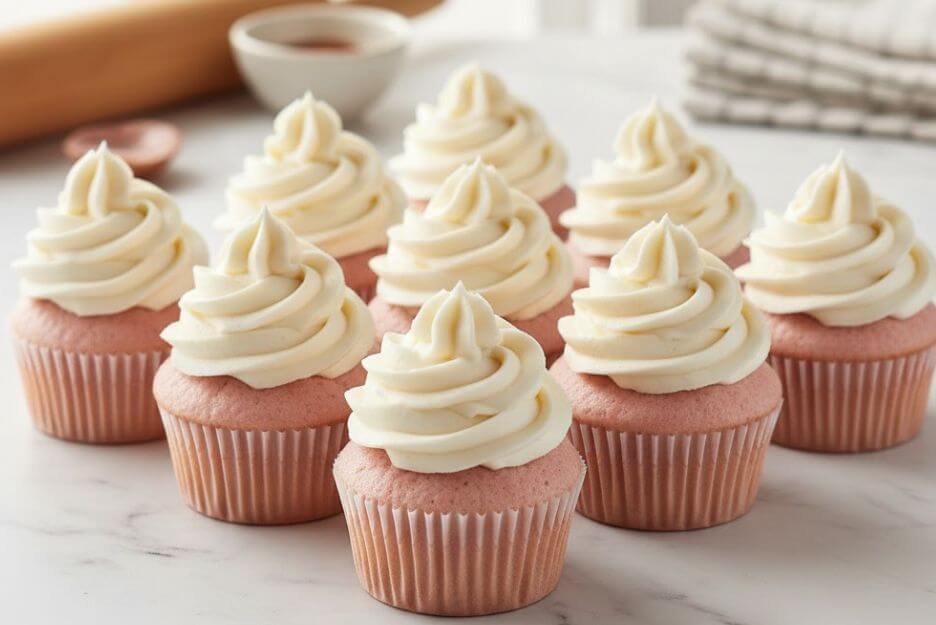
Step 9: Prepare the White Frosting
While the cakes cool, prepare the white frosting. In a large bowl, beat the softened butter until creamy. Gradually add the sifted powdered sugar, alternating with the milk or heavy cream, until you reach a creamy, smooth, and pipeable consistency. This perfectly white buttercream is the finishing touch.
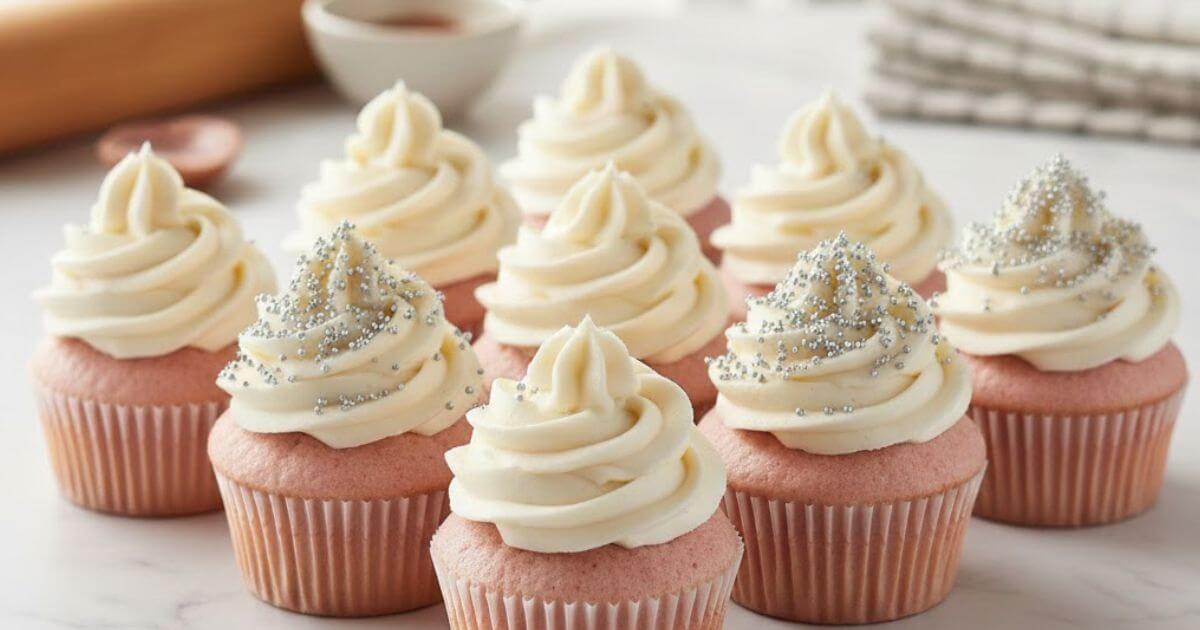
Step 10: Decorate and Enjoy
Transfer the white frosting to a piping bag fitted with your favorite tip. Swirl a generous amount of frosting onto each cooled pink cupcake. Enjoy your beautiful best pink and white cupcakes!
Expert Tips & Variations: Mastering the Swirl
Even a simple recipe can be perfected with a few insider tricks. Use these expert tips to ensure your easy pink and white cupcakes turn out bakery-quality every time.
Practical Baking Tips:
- Room Temperature is Key: Ensure your butter, eggs, and milk are all at room temperature. This allows them to emulsify and blend better, creating a smoother, more uniform batter and a lighter final texture.
- Sift Your Sugar: Always sift your powdered sugar for the frosting. This simple step eliminates lumps, giving you that velvety, smooth white buttercream.
- The Gel Difference: Use gel food coloring instead of liquid. Liquid coloring can thin out your batter and the color won’t be as vibrant. Gel gives you a deeper, richer pink hue without altering the batter consistency.
- Don’t Overfill: Filling the liners 2/3 full is the sweet spot. Overfilling leads to ‘muffin-top’ overflow and cakes that stick to the pan.
- Cool Completely: Patience is a baker’s virtue! Don’t rush the cooling process, or your gorgeous white frosting will melt and slide off the pink base.
Common Mistakes and How to Avoid Them:
- Tough Cupcakes: This is usually due to overmixing the batter after the flour is added. Mix only until the streaks of flour disappear.
- Dense Cupcakes: This can happen if your leavening agent (baking powder) is expired, or if your butter wasn’t properly creamed with the sugar.
- Grainy Frosting: This is a sign you didn’t sift your powdered sugar. Always sift!
Pink Cupcakes Variations:
- Strawberry Swirl: Add 1 tablespoon of strawberry puree to the pink batter for a fruity flavor boost.
- Marbled Effect: Instead of fully folding the pink color in, leave a few streaks of white batter for a light, marbled effect.
- Double Dip: Use half the batter for pink cupcakes and the other half for plain vanilla cupcakes, then use the white frosting on both!
Storage & Reheating Instructions
You’ll want to keep your delicious Pink and White Cupcakes fresh and moist for as long as possible!
- How to Store Leftovers: Always store frosted cupcakes in an airtight container at room temperature. The airtight seal prevents them from drying out.
- Shelf Life Information: When stored properly at room temperature, these cupcakes will stay fresh and delicious for 3-4 days. If your kitchen is very warm, consider refrigerating them, but bring them back to room temperature before serving for the best texture.
- Freezing Instructions: You can freeze the unfrosted pink cupcakes for up to 3 months. Let them cool completely, then wrap them tightly in plastic wrap and place them in a freezer bag or container. Thaw overnight at room temperature before frosting. We do not recommend freezing the frosted cupcakes as the texture of the buttercream may change upon thawing.
- Best Reheating Methods: Cupcakes are generally best enjoyed at room temperature. There is no need for reheating! If they were refrigerated, just allow them to sit out for about an hour before serving.
Serving Suggestions: Pairing for Perfection
These charming Pink and White Cupcakes are beautiful on their own, but a few small touches can turn them into a stunning centerpiece for any gathering.
- Side Dish Complement: For a dessert table, pair them with something fresh and tart to balance the sweetness. A bowl of fresh mixed berries (strawberries, raspberries, blueberries) or a light, chilled lemon sorbet are wonderful complements.
- Garnishes and Presentation:
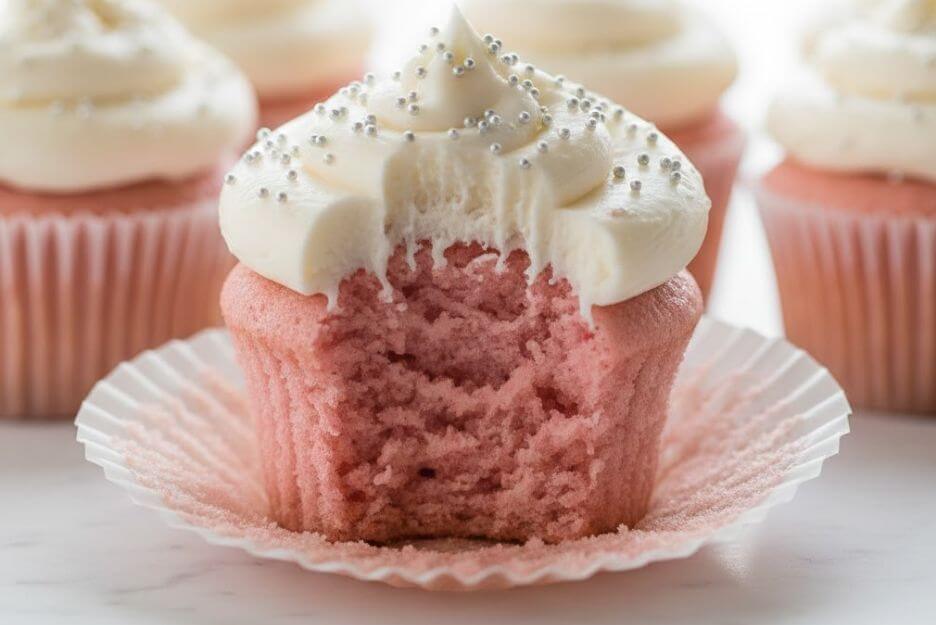
- Sprinkles: Add a few silver or white nonpareils or sanding sugar to the frosting swirl immediately after piping.
- Cherry on Top: A single maraschino cherry or a fresh raspberry adds a pop of color and flavor contrast.
- Edible Glitter: A light dusting of edible pink or silver glitter takes the elegance up a notch.
- Beverage Pairings: These vanilla-based treats go wonderfully with:
- Classic Coffee or Espresso: The bitterness cuts through the sweetness beautifully.
- Milk: A cold glass of milk is the timeless, simple pairing.
FAQ Section: Your Pink Cupcake Questions Answered
We know you might have a few questions before diving into the pink and white cupcakes recipes!
Q: Why are my pink cupcakes dry?
A: This is usually because you overbaked them. Start checking them at the 17-minute mark. Also, ensure you measure your flour correctly (spoon flour into the measuring cup, then level off, rather than scooping directly from the bag).
Q: How do I get a truly vibrant pink color?
A: Use gel food coloring, not liquid drops. Gel is highly concentrated and won’t water down your batter. Start with 2 drops, mix, and add one more drop at a time until you reach your desired shade. This is the secret to professional-looking pink cupcakes.
Q: How do I store the cupcakes in hot weather?
A: If it’s very hot, it is best to store the finished pink and white cupcakes in the refrigerator. Just be sure to take them out an hour before serving so the cake and frosting can soften to their ideal texture.
Q: Can I use oil instead of butter in the cake?
A: Yes, you can substitute the melted butter with the same amount of vegetable oil for a slightly more moist crumb. However, butter provides a richer, more classic vanilla flavor, which is why we recommend it for the best pink and white cupcakes.
Q: What is the best way to fill the liners evenly?
A: Use an ice cream scoop (about 1/4 cup size) to portion the batter into the liners. This ensures all your easy pink and white cupcakes bake at the same rate and look uniform.
A Sweet Success Story
Congratulations! You are now equipped with a comprehensive guide to create absolutely perfect Pink and White Cupcakes. We’ve covered everything from the proper ingredients and tools to the expert tips and storage methods. This recipe truly is one of the easiest ways to achieve a stunning, bakery-quality dessert right in your own kitchen. Whether you’re a novice baker or an experienced pro, these charming pink and white treats are guaranteed to bring a smile to anyone’s face. Now go get baking!