Mini Chocolate Tart Recipe: 5 Easy Steps for Rich Flavor
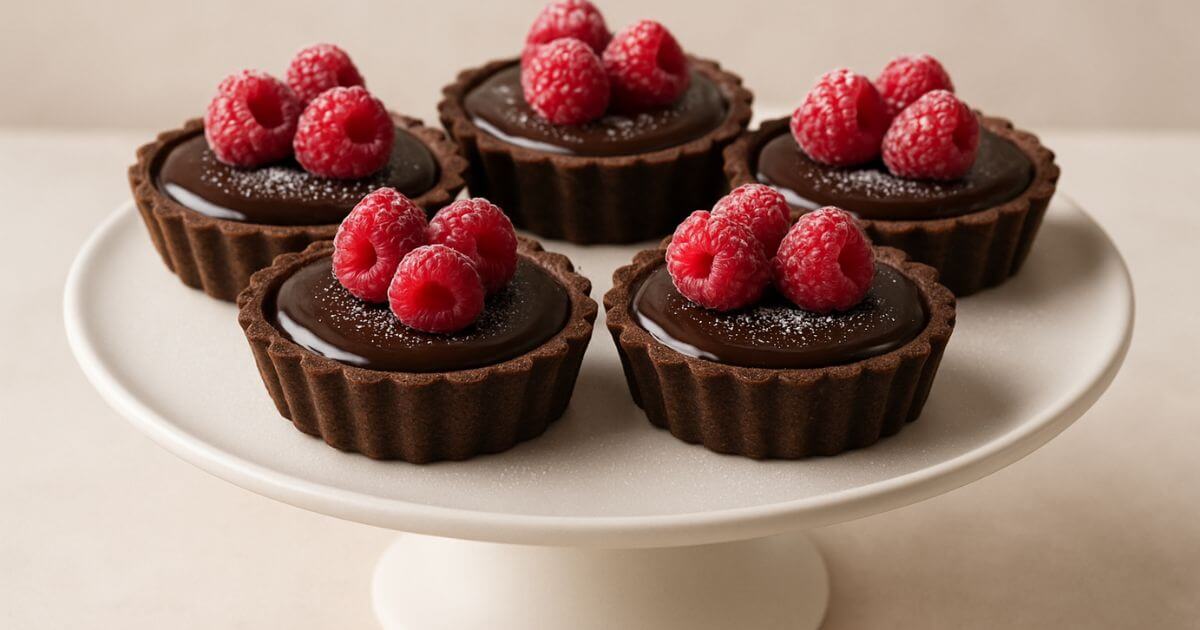
There’s something magical about biting into a perfectly crafted mini chocolate tart – that satisfying crack of the pastry shell giving way to silky, rich chocolate filling. These individual chocolate tarts recipe gems have been stealing hearts at dinner parties and tea rooms for centuries, and today I’m sharing the secrets to creating bakery-quality treats in your own kitchen.
The art of chocolate tart-making traces back to French patisseries, where skilled bakers perfected the balance between buttery pastry and decadent chocolate ganache. What makes this mini chocolate tart recipe so special is its versatility – you can prepare these elegant desserts ahead of time, customize them for dietary needs, and present them as sophisticated individual portions that never fail to impress.
The best part? This easy mini chocolate tart recipe requires no advanced baking skills, uses readily available ingredients, and can be completed in under two hours. Whether you’re planning a romantic dinner for two or hosting a crowd, these mini dark chocolate tarts deliver maximum impact with minimal fuss.
Ready to transform simple ingredients into stunning desserts? Let’s dive into this foolproof mini chocolate tart recipe that will have your guests asking for seconds.
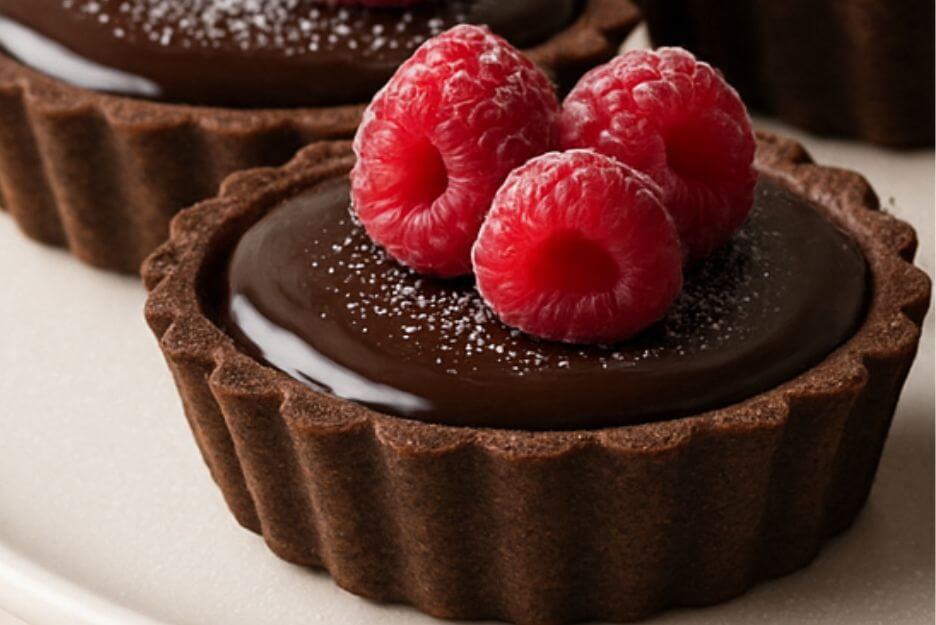
Table of Contents
Ingredients
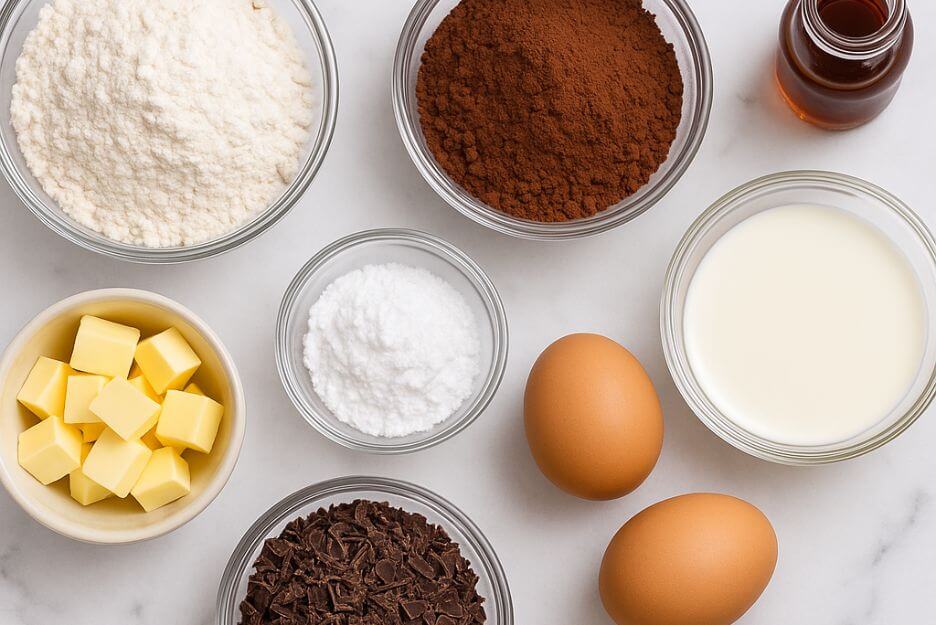
For the Pastry Shell:
- 1¼ cups all-purpose flour
- ¼ cup unsweetened cocoa powder
- ¼ cup powdered sugar
- ½ teaspoon salt
- 6 tablespoons cold unsalted butter, cubed
- 1 large egg yolk
- 2-3 tablespoons ice water
For the Chocolate Filling:
- 6 oz dark chocolate (70% cocoa), finely chopped
- ½ cup heavy cream
- 2 tablespoons unsalted butter
- 1 large egg
- 2 tablespoons granulated sugar
- 1 teaspoon vanilla extract
- Pinch of salt
Optional Garnishes:
- Fresh berries (raspberries, strawberries, or blueberries)
- Whipped cream
- Chocolate shavings
- Powdered sugar for dusting
- Mint leaves
Ingredient Substitutions:
- Gluten-free option: Replace all-purpose flour with 1:1 gluten-free flour blend
- Dairy-free version: Use coconut oil instead of butter and coconut cream instead of heavy cream
- Egg-free alternative: Substitute egg yolk with 1 tablespoon aquafaba (chickpea liquid)
- Sugar alternatives: Replace granulated sugar with coconut sugar (reduce liquid accordingly)
Equipment and Tools Needed
Essential Equipment:
- 6-8 mini tart pans (4-inch diameter) or one 12-cup muffin tin
- Food processor or large mixing bowl
- Rolling pin
- Measuring cups and spoons
- Small saucepan
- Whisk
- Rubber spatula
Alternative Tools:
- No food processor? Use a pastry cutter or two knives to cut butter into flour
- No mini tart pans? Use a standard muffin tin or ramekins
Step-by-Step Instructions
Step 1: Mix the Chocolate Pastry Base
Set your oven temperature to 350°F (175°C). Using a food processor, combine the flour, cocoa powder, powdered sugar, and salt with quick pulses until everything is evenly distributed. Drop in your chilled butter pieces and continue pulsing until you see a mixture that looks like breadcrumbs with some larger butter chunks still visible.
Drop in the egg yolk and give it a few quick pulses. Now comes the tricky part – drizzle in the ice water one tablespoon at a time, pulsing between additions. Stop as soon as the mixture starts clumping together when you squeeze it in your palm, but it shouldn’t feel wet or sticky.
Step 2: Shape Your Tart Shells
Gather your dough and place it on a clean, lightly floured counter. Give it just a few gentle kneads until it comes together smoothly. Split this into 6-8 equal chunks – think of it like dividing pizza slices. Take each piece and roll it out into a circle that’s about 5 inches across and roughly ⅛-inch thick.
Now for the fun part – gently press each dough circle into your tart pans. Trim any overhang and create pretty crimped edges with your fingers or a fork. Don’t forget to poke several holes in the bottom with a fork – this prevents annoying puffing during baking.
Step 3: Pre-Bake the Pastry Shells
Cut small squares of parchment paper and nestle them into each shell. Fill these with pie weights, dried beans, or even clean coins to weigh down the pastry. Slide into your preheated oven for 12-15 minutes until you notice the edges looking firm and set.
Carefully remove the weights and parchment, then pop them back in the oven for another 5-7 minutes. You’ll know they’re ready when the bottoms look completely dry and cooked through.
Chef’s secret: These shells need to be completely baked now because they’ll only get a quick final bake with the filling later.
Step 4: Create the Chocolate Ganache Filling
While shells cool, place chopped dark chocolate in a heatproof bowl. Heat cream in a small saucepan until it just begins to simmer (don’t let it boil).Pour the heated cream over the chocolate and let it rest for 2 minutes.
Then gently whisk from the center outwards until the mixture is smooth and glossy. Stir in butter, vanilla, and salt until completely incorporated. In a separate bowl, whisk egg with sugar until pale, then slowly whisk in the chocolate mixture.
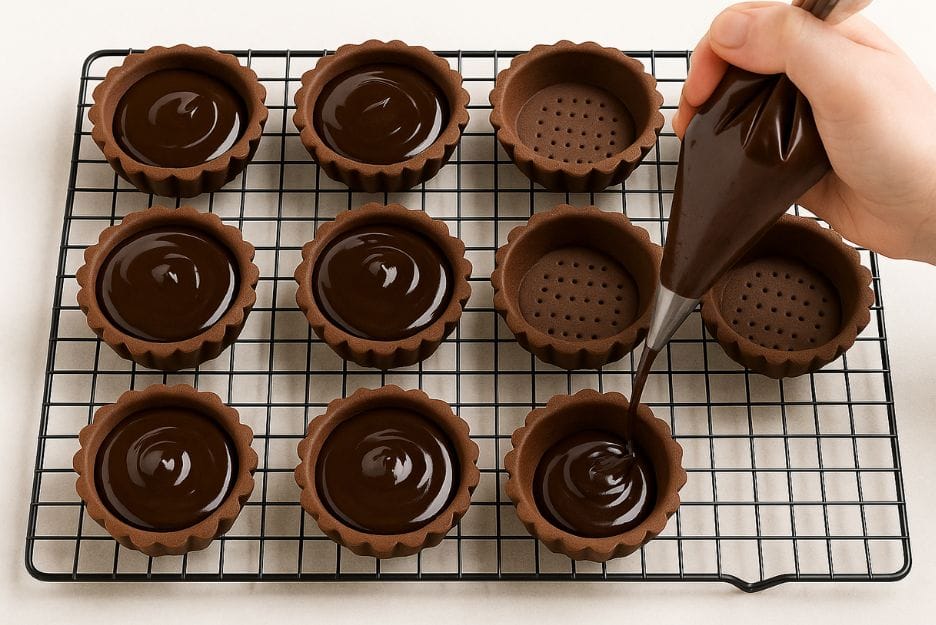
Step 5: Assemble and Bake
Divide the chocolate filling evenly among the pre-baked shells, filling each about ¾ full. Return to the oven and bake for 8-10 minutes until the filling is just set but still slightly jiggly in the center.
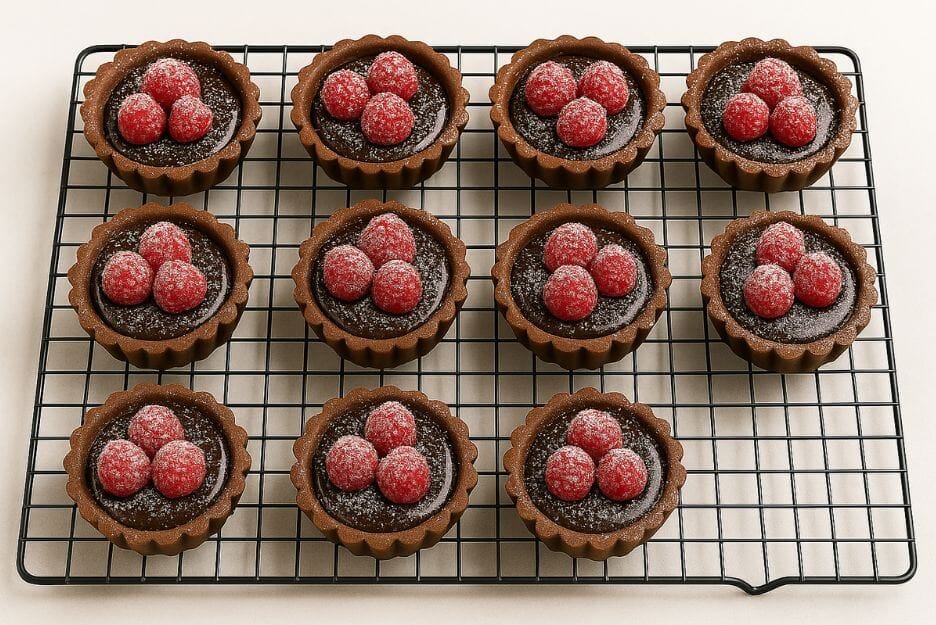
Cool completely on a wire rack before removing from pans. The easy mini chocolate tart recipe results in perfectly set tarts that hold their shape beautifully.
Expert Tips & Variations
Professional Baking Tips:
Temperature matters: Use room temperature eggs and butter for the filling to ensure smooth incorporation without lumps.
Prevent soggy bottoms: Brush the pre-baked shells with a thin layer of melted chocolate before adding the filling for an extra barrier against moisture.
Avoid overmixing: When combining the chocolate and cream, whisk gently to prevent incorporating too much air, which can create bubbles in your finished tarts.
Perfect timing: The filling should still have a slight jiggle when you remove it from the oven – it will continue to set as it cools.
Creative Variations:
Transform your mini dark chocolate tarts with these exciting flavor combinations:
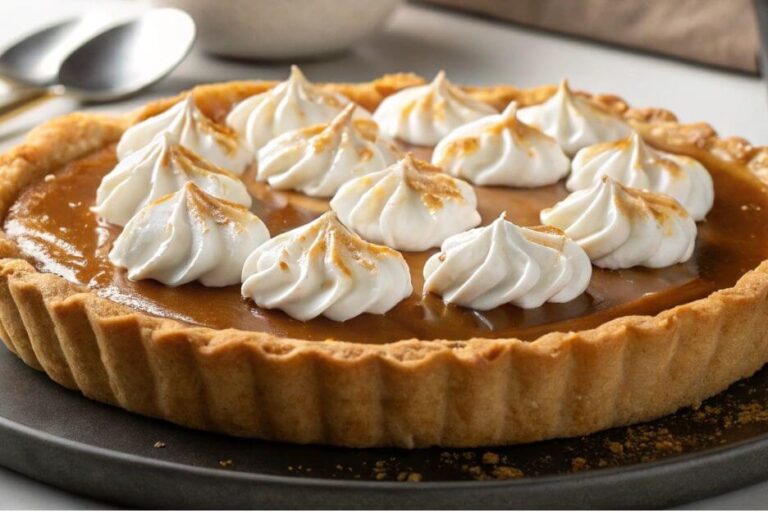
Salted Caramel Twist: Add 2 tablespoons of caramel sauce to the filling and sprinkle with flaky sea salt before serving.
Orange Zest Enhancement: Incorporate the zest of one orange into the filling for a bright, citrusy note that complements the rich chocolate.
Espresso Intensifier: Add 1 tablespoon of instant espresso powder to the filling for a sophisticated mocha flavor.
Common Mistakes to Avoid:
Don’t skip the blind baking step – this ensures your pastry stays crisp and doesn’t become soggy from the filling.
Avoid overbaking the filled tarts, as this can result in a grainy texture rather than the desired smooth, creamy consistency.
Nutritional Information
Per Mini Tart (makes 8 servings):
- Calories: 285
- Total Fat: 18g
- Saturated Fat: 11g
- Cholesterol: 55mg
- Sodium: 125mg
- Total Carbohydrates: 28g
- Dietary Fiber: 3g
- Sugars: 15g
- Protein: 5g
Health Benefits:
Dark chocolate (70% cocoa) contains flavonoids that may support heart health and provide antioxidant benefits. The moderate portion size of these individual treats makes them a more mindful dessert choice compared to larger tarts.
Eggs provide high-quality protein and essential amino acids, while the small amount of cream adds calcium and vitamin A to each serving.
Nutritional information is approximate and may vary based on specific ingredients used.
Storage & Reheating Instructions
Short-term Storage:
Store your finished mini chocolate tart recipe creations in the refrigerator for up to 4 days. Cover with plastic wrap or store in an airtight container to maintain freshness and prevent the tarts from absorbing other flavors.
Freezing Instructions:
These tarts freeze beautifully for up to 3 months. Wrap individual tarts in plastic wrap, then place in a freezer-safe container. Thaw overnight in the refrigerator before serving.
For best results, freeze the tarts without garnishes and add fresh berries or whipped cream just before serving.
Serving Temperature:
These tarts are delicious served chilled directly from the refrigerator or at room temperature. If serving at room temperature, remove from the refrigerator 30-45 minutes before serving to allow the chocolate filling to soften slightly.
Reheating note: These tarts are best served cold or at room temperature. Reheating is not recommended as it can cause the chocolate filling to become too soft and lose its structure.
Serving Suggestions
Complementary Accompaniments:
Coffee pairings: These individual chocolate tarts recipe treats pair beautifully with espresso, French press coffee, or a rich cappuccino.
Ice cream combinations: Vanilla bean, salted caramel, or raspberry ice cream creates a delightful temperature and texture contrast.
Seasonal Garnish Ideas:
Spring: Fresh strawberries and edible flowers Summer: Mixed berries and mint Fall: Candied orange peel and cinnamon dust Winter: Pomegranate seeds and rosemary sprigs
Frequently Asked Questions
What’s the best chocolate to use for this recipe?
Use high-quality dark chocolate with 70% cocoa content for the best flavor and texture. Brands like Ghirardelli, Lindt, or Valrhona work excellently. Avoid chocolate chips as they contain stabilizers that can affect the smooth texture of your ganache.
Why did my chocolate filling crack?
Cracking usually occurs from overbaking or temperature shock. Make sure to bake just until the center is barely set, and allow the tarts to cool gradually at room temperature before refrigerating.
How do I prevent the pastry from shrinking?
Ensure your dough is well-chilled before rolling, don’t stretch it when placing in the pans, and allow it to rest in the refrigerator for 30 minutes before blind baking. This helps relax the gluten and prevents shrinkage.
Can I double this recipe for a larger batch?
Definitely! This mini dark chocolate tarts recipe scales up perfectly. Just make sure you have enough tart pans, or bake in batches. The filling can be made in larger quantities and divided among all the shells.
What if I don’t have mini tart pans?
You can use a regular muffin tin, ramekins, or even make one large tart in a 9-inch tart pan. Adjust baking times accordingly – a large tart will need about 25-30 minutes total baking time.
This mini chocolate tart recipe proves that impressive desserts don’t require complicated techniques or exotic ingredients. With just a few simple steps, you can create elegant individual treats that rival those from the finest patisseries.
The combination of rich chocolate pastry and silky ganache filling creates a dessert that’s both visually stunning and incredibly satisfying. Whether you’re hosting a dinner party, celebrating a special occasion, or simply treating yourself to something special, these individual chocolate tarts recipe gems deliver every time.
The beauty of this easy mini chocolate tart recipe lies in its versatility – customize the flavors, prepare components ahead of time, and present them with confidence knowing you’ve mastered a classic dessert technique.