How to Master Chocolate Brownie Pie in 7 Easy Steps
Imagine biting into a dessert that combines the fudgy richness of brownies with the elegant presentation of a pie. That’s exactly what you get with a chocolate brownie pie – the perfect marriage of two beloved desserts that creates something even more extraordinary.
The origins of the brownie pie can be traced back to American kitchens of the mid-20th century when home bakers began experimenting with combining traditional pie crusts with brownie batter. This innovation quickly gained popularity for its simplicity and crowd-pleasing appeal. Today, the chocolate brownie pie remains a staple at family gatherings, holiday celebrations, and potlucks across the country.
What makes this chocolate brownie pie recipe truly special is how approachable it is for bakers of all skill levels. With straightforward ingredients and techniques, you can create a dessert that looks professional but requires minimal effort. It’s budget-friendly, can be prepared ahead of time, and delivers that intense chocolate satisfaction we all crave.
In this guide, I’ll walk you through creating the perfect chocolate brownie pie, from selecting quality ingredients to mastering the baking process and serving it with style. Let’s dive into this decadent treat that’s guaranteed to become a new favorite in your recipe collection.
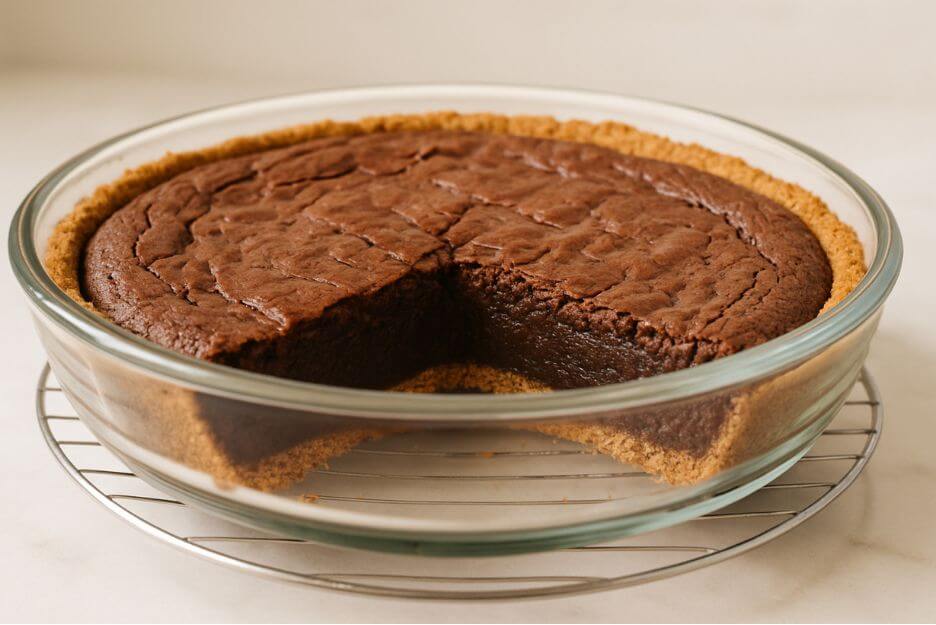
Table of Contents
Ingredients

For the Crust:
- You’ll need about 1 and 1/2 cups of graham cracker crumbs — that’s roughly 9 to 10 full sheets.
- 6 tablespoons unsalted butter, melted
- ¼ cup granulated sugar
- ¼ teaspoon salt
For the Brownie Filling:
- 1 cup (8 oz) high-quality semisweet chocolate, chopped
- ½ cup (1 stick) unsalted butter
- 1 cup granulated sugar
- 2 large eggs, room temperature
- 1 teaspoon pure vanilla extract
- ½ cup all-purpose flour
- 2 tablespoons unsweetened cocoa powder
- ¼ teaspoon salt
- ½ cup of chocolate chips (optional, for a boost of extra chocolate flavor)
For the Topping (Optional):
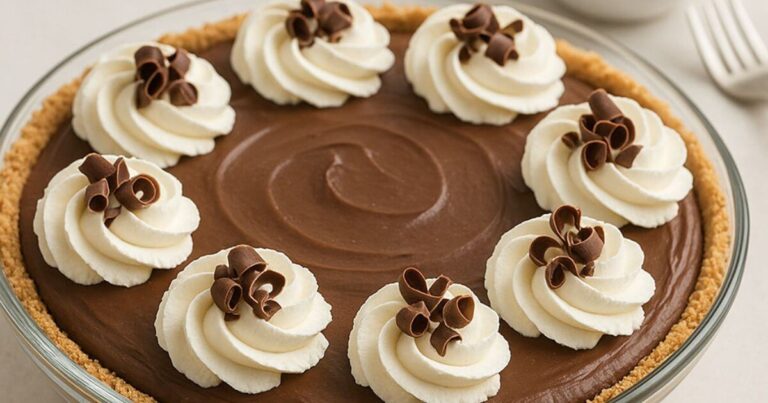
- 1 cup heavy whipping cream
- 2 tablespoons powdered sugar
- ½ teaspoon vanilla extract
- Chocolate shavings for garnish
Ingredient Substitutions:
Dietary Restrictions:
- Gluten-Free: Replace graham crackers with gluten-free graham crackers and use a measure-for-measure gluten-free flour blend.
- Dairy-Free: Substitute vegan butter and dairy-free chocolate. For the topping, use coconut cream instead of heavy cream.
- Egg-Free: Replace each egg with ¼ cup unsweetened applesauce or a commercial egg replacer.
Ingredient Quality Notes:
- The quality of your chocolate really makes a difference in the final flavor. For a smoother filling, it’s best to use baking chocolate bars instead of chocolate chips, since they melt more evenly.
- Make sure your eggs are at room temperature — they blend into the batter much better and help create a silky-smooth texture.
- For the best crust, use fresh graham crackers. Avoid ones that have been sitting around in your pantry for months fresh makes all the difference.
Equipment/Tools Needed
- 9-inch pie plate (preferably glass or ceramic)
- Medium microwave-safe bowl
- Large mixing bowl
- Whisk
- Rubber spatula
- Measuring cups and spoons
- Food processor or rolling pin (for crushing graham crackers)
- Cooling rack
- You’ll need a stand mixer or a hand mixer to whip up the cream topping.
Equipment Alternatives:
- No food processor? Place graham crackers in a sealed plastic bag and crush with a rolling pin or heavy pot.
- A microwave works well for melting chocolate and butter, but you can also use a double boiler if preferred.
- No stand mixer? Whipped cream can be made with a hand mixer or even a whisk and some elbow grease.
Step-by-Step Instructions
Step 1: Prepare Your Workspace and Ingredients
Preheat your oven to 350°F (175°C). Gather all ingredients and allow refrigerated items like eggs and butter to come to room temperature. Chop the chocolate for the filling into small, even pieces to ensure smooth melting.
Step 2: Make the Graham Cracker Crust
In a medium bowl, mix together the graham cracker crumbs, melted butter, sugar, and a pinch of salt. Mix until the mixture resembles wet sand and holds together when pressed. Pour the mixture into your pie plate and firmly press it across the bottom and up the sides using the back of a measuring cup or your fingers. The even pressure helps create a sturdy crust.
Step 3: Pre-Bake the Crust
Bake the crust for 8–10 minutes, until golden and fragrant. Remove it from the oven and allow it to cool slightly as you prepare the filling. Keep the oven on at the same temperature.
Step 4: Prepare the Brownie Filling
Microwave in 30-second bursts, stirring in between, until the chocolate is fully melted and smooth (usually 1–2 minutes). Just be careful not to overheat it, since chocolate can burn quickly. Let it cool for about 5 minutes before using.
Step 5: Mix the Brownie Batter
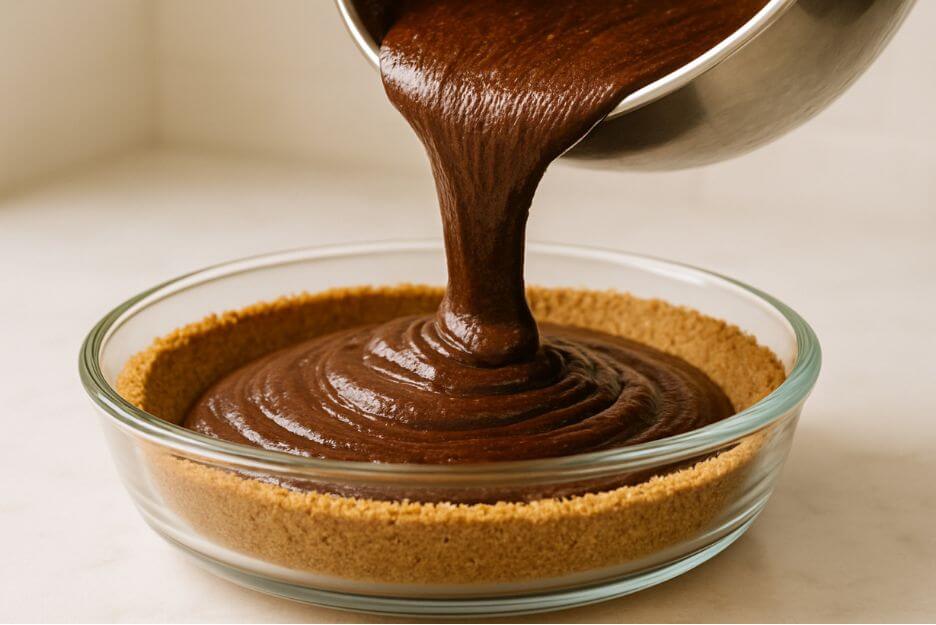
In a large bowl, whisk together the sugar and melted chocolate mixture until well combined. Add the eggs one at a time, whisking well after each addition. Stir in the vanilla extract. In a small bowl, whisk together the flour, cocoa powder, and salt, then gently fold it into the chocolate mixture until no dry spots are left. If you’re using chocolate chips, fold them in at the end.
Step 6: Bake the Chocolate Brownie Pie
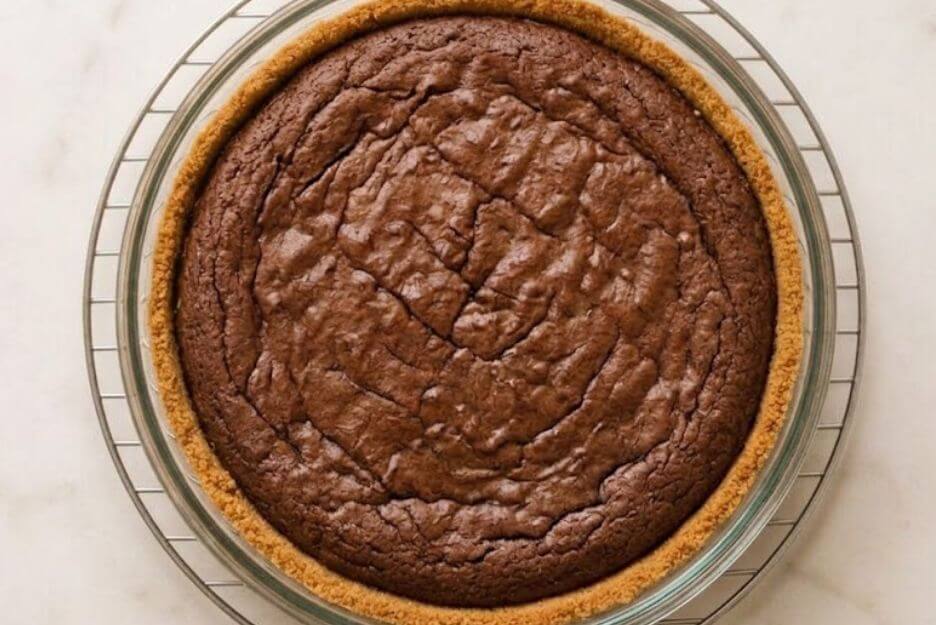
Pour the brownie batter into the pre-baked crust, spreading it out evenly with a spatula. Bake for 25–30 minutes, or until the center is set but still slightly soft. The pie should jiggle a bit in the center, but it shouldn’t be liquid. To check, insert a toothpick about 2 inches from the edge it should come out with a few moist crumbs.
Step 7: Cool and Serve
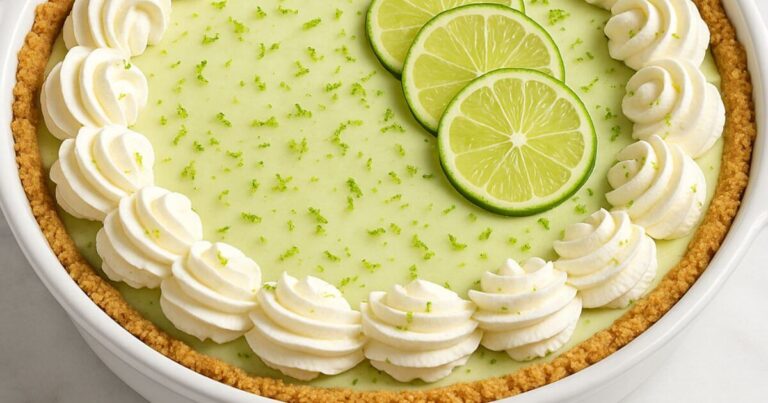
Allow the pie to cool completely on a wire rack, at least 2 hours. For the cleanest slices, refrigerate for an additional hour after cooling. If desired, prepare whipped cream topping by beating heavy cream with powdered sugar and vanilla until soft peaks form. Serve slices with a dollop of whipped cream and chocolate shavings.
Expert Tips & Variations
- Don’t Overbake: The secret to a fudgy brownie pie is removing it from the oven while the center is still slightly soft. It will continue cooking from residual heat and firm up as it cools.
- Enhance the Flavor: Add ½ teaspoon of espresso powder to the brownie batter to intensify the chocolate flavor without adding coffee taste.
- Perfect Slicing: Use a sharp knife dipped in hot water and wiped clean between cuts for picture-perfect slices.
- Crust Alternative: For a traditional pie experience, use a blind-baked pastry crust instead of graham cracker crust.
- Flavor Variations:
- Mint Chocolate: Add ¼ teaspoon of mint extract to the brownie batter
- Salted Caramel: Drizzle caramel sauce and flaky sea salt over the cooled pie
- Nutty: Add ½ cup of chopped walnuts or pecans to the brownie batter
- Mexican Chocolate: Add ½ teaspoon cinnamon and a pinch of cayenne pepper
- Common Mistakes:
- Using cold eggs can cause the chocolate to seize
- Don’t overmix the batter once you’ve added the flour, or the brownies might turn out tough.
- Not allowing the pie to cool completely before slicing will result in messy servings
Nutritional Information
Per Slice (1/8 of pie, without whipped cream):
- Calories: 450
- Protein: 5g
- Carbohydrates: 52g
- Fat: 25g
- Saturated Fat: 15g
- Fiber: 2g
- Sugar: 35g
- Sodium: 220mg
Health Benefits: Dark chocolate contains antioxidants called flavonoids, which may help reduce inflammation and improve heart health when consumed in moderation. The cocoa in this recipe also provides small amounts of iron, magnesium, and zinc.
Disclaimer: Nutritional information is an estimate and will vary based on specific ingredients used and serving size.
Storage & Reheating Instructions
Refrigerator Storage: The chocolate brownie pie can be stored in the refrigerator, covered with plastic wrap or in an airtight container, for up to 5 days. The texture actually gets better after the first day as the flavors have a chance to meld together.
Freezing Instructions: This pie freezes beautifully! For best results:
- Allow the pie to cool completely
- Wrap individual slices or the whole pie (without topping) tightly in plastic wrap, then aluminum foil
- Freeze for up to 3 months
- Label with the date and contents
Reheating Methods:
- Room Temperature: For the fudgiest texture, allow frozen or refrigerated slices to come to room temperature (about 30-60 minutes)
- Warm: For a more molten center, microwave individual slices for 15-20 seconds
- Add topping fresh: Always add whipped cream or ice cream just before serving, not before storage
Serving Suggestions
Complementary Side Dishes:
- Vanilla Ice Cream: The classic hot-and-cold contrast with a warm slice is unbeatable
- Fresh Berries: Raspberries or strawberries add brightness and cut through the richness
- Caramel Sauce: Drizzle warm caramel sauce over each slice for a turtle brownie effect
- Coffee or Espresso: The bitter notes perfectly complement the sweet chocolate
Presentation Ideas:
- Dust the plates with cocoa powder before adding the slices
- Top with a mint leaf for a fresh pop of color
- Drizzle raspberry or caramel sauce in a fun pattern on the plate
- For special occasions, add a chocolate decoration or gold leaf
Beverage Pairings:
- Coffee or espresso highlights the chocolate notes
- Cold milk (dairy or plant-based) provides a refreshing contrast
- Hot chocolate for the ultimate chocolate lover’s treat
FAQ Section
Q: Why did my brownie pie crack on top? A: Cracks typically occur from overbaking or cooling too quickly. Try reducing the baking time by 2-3 minutes in your next attempt, and always cool the pie at room temperature rather than in the refrigerator immediately.
Q: Can I use boxed brownie mix for this chocolate brownie pie ? A: Yes, you can use a boxed brownie mix as a shortcut. Prepare according to package directions (omitting the water) and pour into the pre-baked crust.
Q: How do I know when my brownie pie is perfectly baked? A: The perfect brownie pie should have a set edge and a center that’s just barely set—it should jiggle slightly when the pie is gently shaken. When you insert a toothpick about 2 inches from the edge, it should come out with a few moist crumbs.
Q: Is this chocolate brownie pie gluten-free? A: The standard recipe isn’t gluten-free, but it can easily be adapted using gluten-free graham crackers and a measure-for-measure gluten-free flour blend.
The chocolate brownie pie combines the best of two beloved desserts—rich, fudgy brownies and elegant pie—into one irresistible treat. With its crunchy graham cracker crust and decadent chocolate filling, this dessert strikes the perfect balance between simplicity and impressive results.
Whether for a special occasion or weeknight treat, this chocolate brownie pie recipe delivers consistent results that will have everyone asking for seconds. Don’t hesitate to try the suggested variations or create your own unique twist on this versatile dessert favorite. Happy baking!